- Posts: 16175
- Thank you received: 504

ACMOC Membership Benefits
- FREE quarterly magazine filled with content about antique Caterpillar machines
- FREE classified listings
- ACMOC store discounts and specials
- Full Bulletin Board Access
- Marketplace (For Sale/Wanted)
- Technical Library
- Post attachments
$44 /year ELECTRONIC
$60 /year USA
$77 /year International
- Forum
- Antique Caterpillar Machinery Owners Club
- DISCUSSION
- 933 Traxcavator d311 engine coolant level changes....head drains
933 Traxcavator d311 engine coolant level changes....head drains
- Old Magnet
-

- Offline
- Platinum Boarder
- Member
Less
More
4 years 6 months ago #213429
by Old Magnet
Replied by Old Magnet on topic 933 Traxcavator d311 engine coolant level changes....head drains
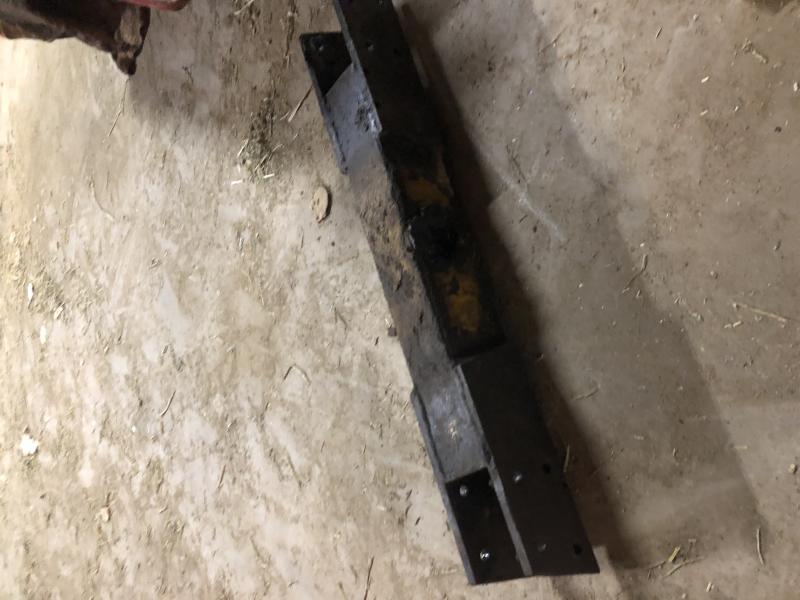
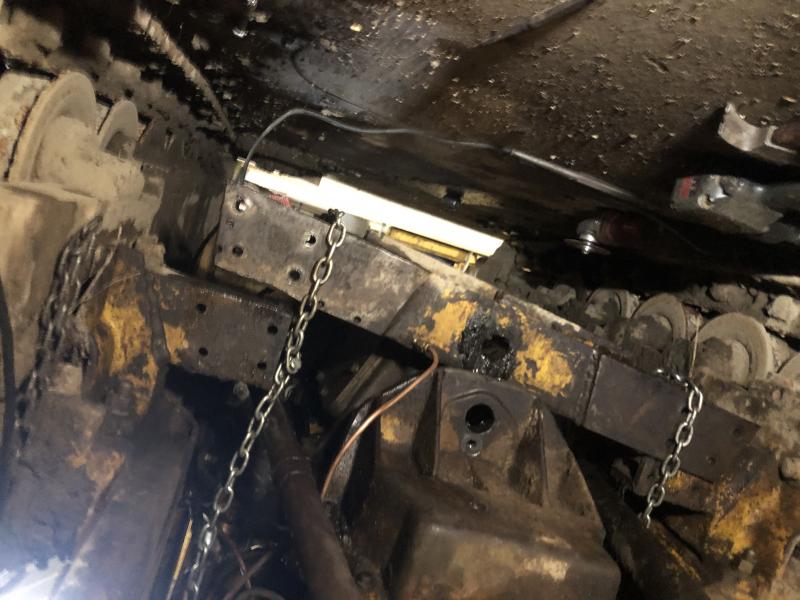
Looking at the pictures of the front engine support it appears to have been modified. Where you see those 4-bolt plates on each side that is not original as the original cross brace is one piece and would need to be removed out the side of the track frame after jacking up the engine. Looks like you could unbolt and drop out the center section to access the oil pan.
Missing/broken track frame bolts should be replaced while your in there but could turn into a major project.
Missing/broken track frame bolts should be replaced while your in there but could turn into a major project.
Please Log in or Create an account to join the conversation.
4 years 6 months ago #213457
by rehpig
Replied by rehpig on topic Cross over frame member
Do you think that the ends, after I remove the center and the oil pan would be removable? What does it take to remove them besides the obvious removal of the three visible bolts? Does it lift off or drop down from the frame or is it attached to the loader frame? This is one piece of the crawler that I have not been able to locate in any 933 parts books.
Please Log in or Create an account to join the conversation.
4 years 6 months ago #213461
by rehpig
Replied by rehpig on topic 933 Traxcavator d311 engine coolant level changes....head drains
Cross member out and pan dropped. Two hours flat. Main and rods indicate .030 stamped into crank.
Please Log in or Create an account to join the conversation.
- Old Magnet
-
- Offline
- Platinum Boarder
- Member
Less
More
- Posts: 16175
- Thank you received: 504
4 years 6 months ago #213463
by Old Magnet
Replied by Old Magnet on topic 933 Traxcavator d311 engine coolant level changes....head drains
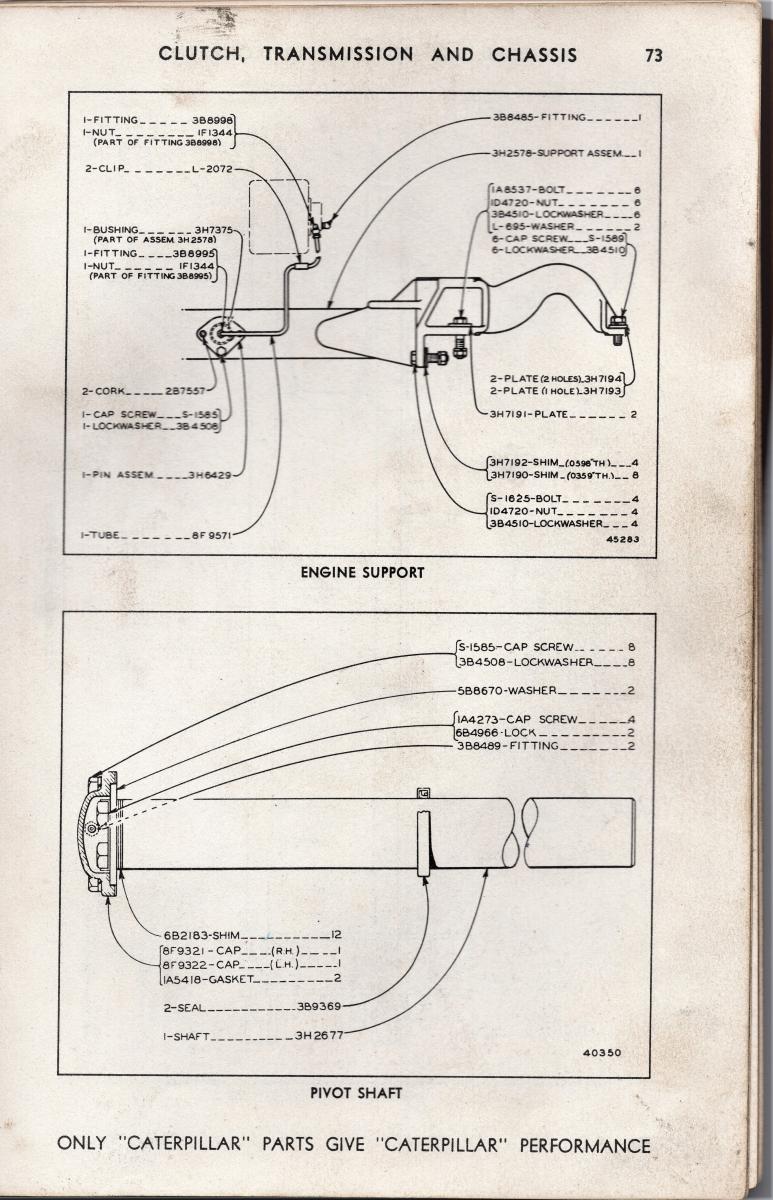
It it's original form the engine/loader frame cross support would be removed by jacking up the engine high enough to slide the bar out the side over the track frame after all the bolts were removed. Should be able to do the same without jacking up the engine since it's now a three piece affair with the pan off. Now would be the time to repair any missing or broken bolts. Early units used bolts with nuts. Later units used cap screws with either weld nuts or tapped directly into frame making replacement that much harder.
Otherwise, your making good progress.
Otherwise, your making good progress.
Please Log in or Create an account to join the conversation.
4 years 6 months ago #213480
by restore49
Replied by restore49 on topic 933 Traxcavator d311 engine coolant level changes....head drains
Remember when the liner pops up you will be flooded with antifreeze. Bob
Please Log in or Create an account to join the conversation.
4 years 6 months ago #213482
by restore49
Replied by restore49 on topic 933 Traxcavator d311 engine coolant level changes....head drains
933 Cross Member
Please Log in or Create an account to join the conversation.
4 years 6 months ago #213483
by rehpig
Somehow I missed the antifreeze bath!!!!!! I tapped the liners up from the bottom with just a 2x4 to the point that they moved around. Then I went above and picked it out......that's when the bath for my floor took place!!! First liner cavity was pretty clean. They progressively got worse as I went back to 4. I did protect the Crank/rod journals and cleaned up all the gunk.
I measured the copper ring and found them all to be around .026 thousands. Its my understanding that the new copper gasket is .030. With all my liner projections at .0015 prior to removal, it seems that I should be about 5 thousands. Does this sound right? I did see some "shims" noted in the literature that you all shared within the liner projection document. My memory says that they were color coded.
The lips that the gasket sits on is REALLY clean and nice.
You were right that this was a pretty simple project and thank you for nudging me to follow through with the correct process.
Replied by rehpig on topic 933 Traxcavator d311 engine coolant level changes....head drains
Remember when the liner pops up you will be flooded with antifreeze. Bob
Somehow I missed the antifreeze bath!!!!!! I tapped the liners up from the bottom with just a 2x4 to the point that they moved around. Then I went above and picked it out......that's when the bath for my floor took place!!! First liner cavity was pretty clean. They progressively got worse as I went back to 4. I did protect the Crank/rod journals and cleaned up all the gunk.
I measured the copper ring and found them all to be around .026 thousands. Its my understanding that the new copper gasket is .030. With all my liner projections at .0015 prior to removal, it seems that I should be about 5 thousands. Does this sound right? I did see some "shims" noted in the literature that you all shared within the liner projection document. My memory says that they were color coded.
The lips that the gasket sits on is REALLY clean and nice.
You were right that this was a pretty simple project and thank you for nudging me to follow through with the correct process.
Please Log in or Create an account to join the conversation.
- Old Magnet
-
- Offline
- Platinum Boarder
- Member
Less
More
- Posts: 16175
- Thank you received: 504
4 years 6 months ago #213484
by Old Magnet
Replied by Old Magnet on topic 933 Traxcavator d311 engine coolant level changes....head drains
Color for the 0.030" shim is blue (5S8122). That may have been a 0.030 shim that was in there. Check new shim thickness to be sure. If it is a true 0.030" that should be a good fit.
Please Log in or Create an account to join the conversation.
- Old Magnet
-
- Offline
- Platinum Boarder
- Member
Less
More
- Posts: 16175
- Thank you received: 504
4 years 6 months ago #213485
by Old Magnet
Replied by Old Magnet on topic 933 Traxcavator d311 engine coolant level changes....head drains
Delete extra post
Please Log in or Create an account to join the conversation.
4 years 6 months ago #213486
by rehpig
Replied by rehpig on topic 933 Traxcavator d311 engine coolant level changes....head drains
A few pictures from today.
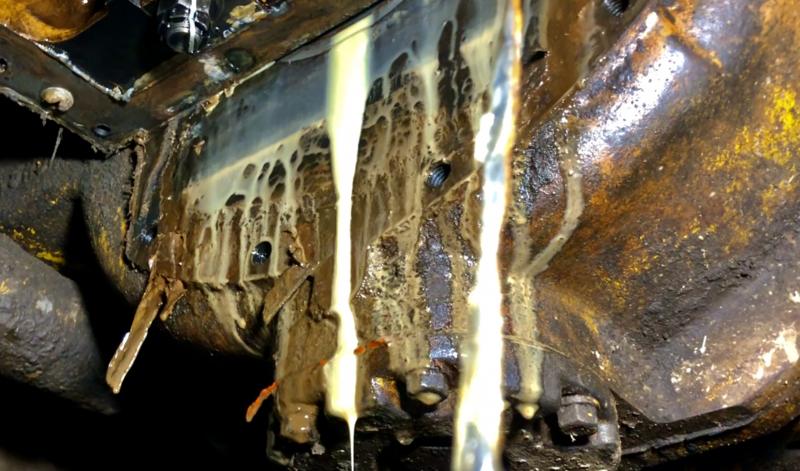
First one is the oil pan/clutch housing. Looks like hell. I have had a difficult time keeping my wet clutch without water mix yuck. I think I finally found where it comes from. When I broke the pan free from the block a good amount of clear water came out. It came from the cavity in the end of the oil pan. Is there supposed to be a gasket there? If you look close at the top of the picture you will see a slight gap the is the interior of the clutch housing. I need to make sure that this is solved prior to reassembly
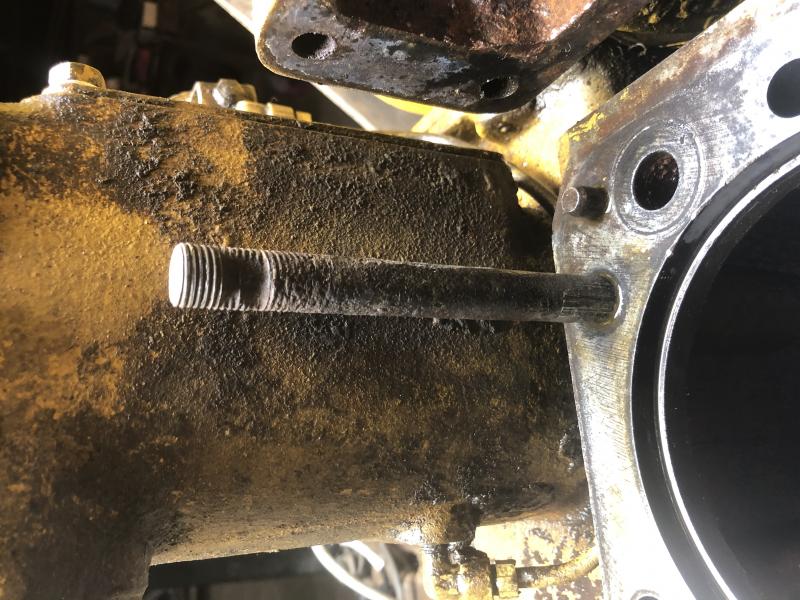
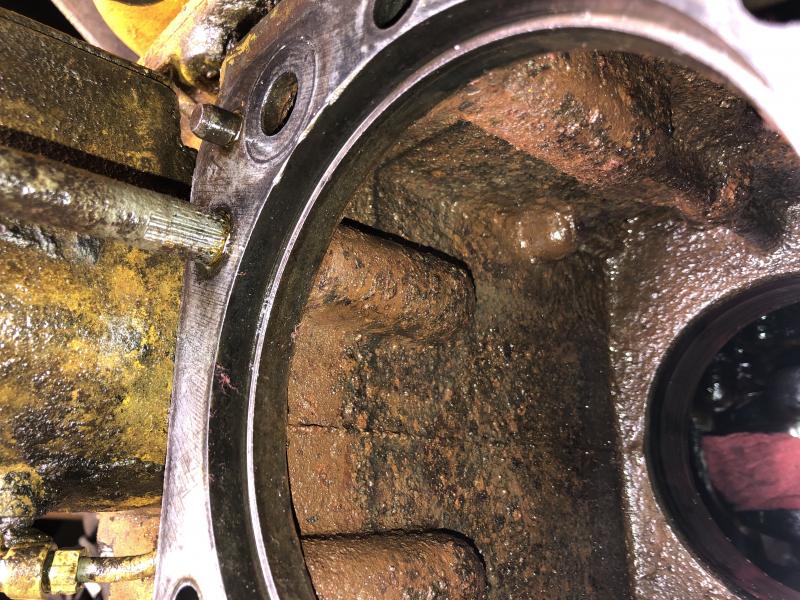
The next photos are of the one destroyed cylinder stud. I have heated it twice... not really hot. Just propane tank and pb blaster. Not giving any signs of loosening. Recommendations? Cutting torch to heat it. Should I heat the block? Other thought would be to weld a sizable nut toward the face of the block. That always works for rusted broken bolts. I just don’t know about doing that so close to the block.
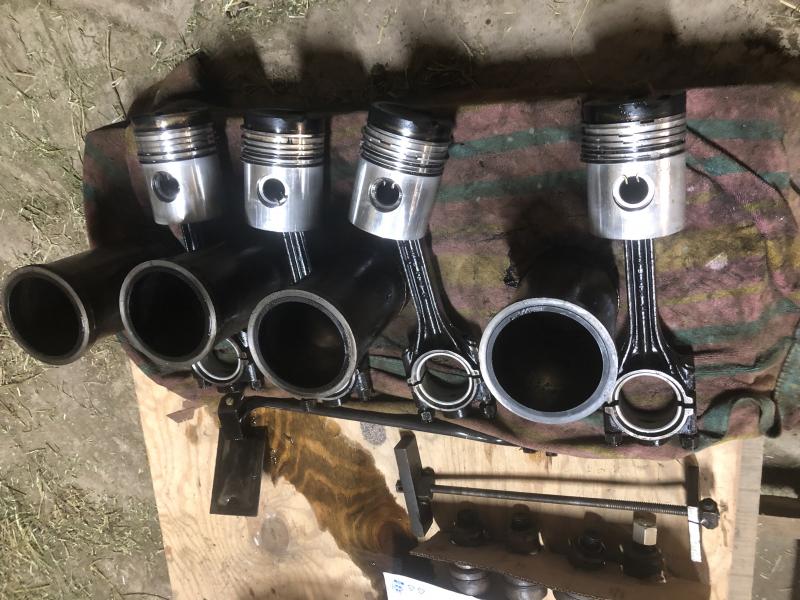
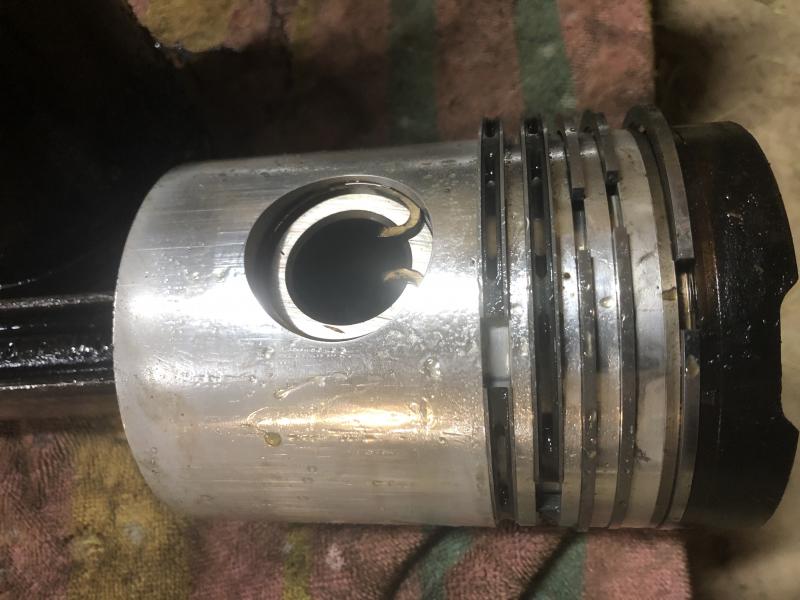
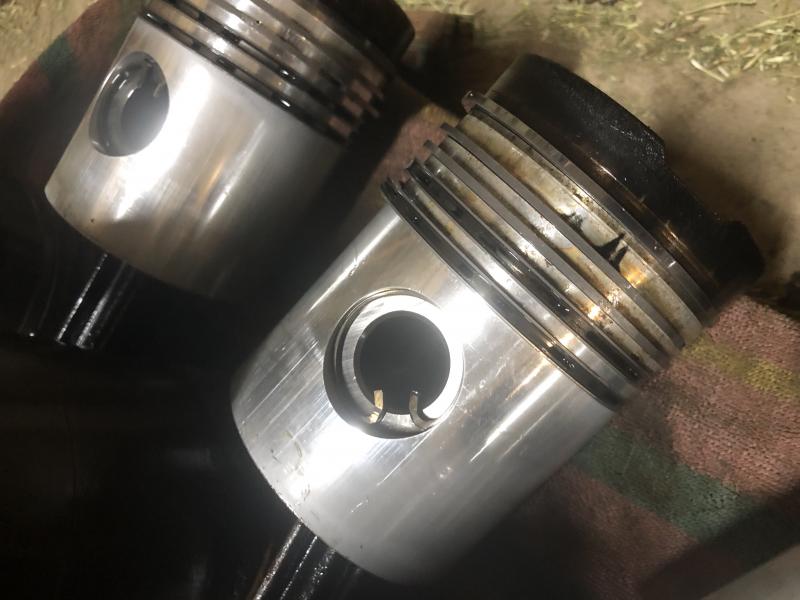
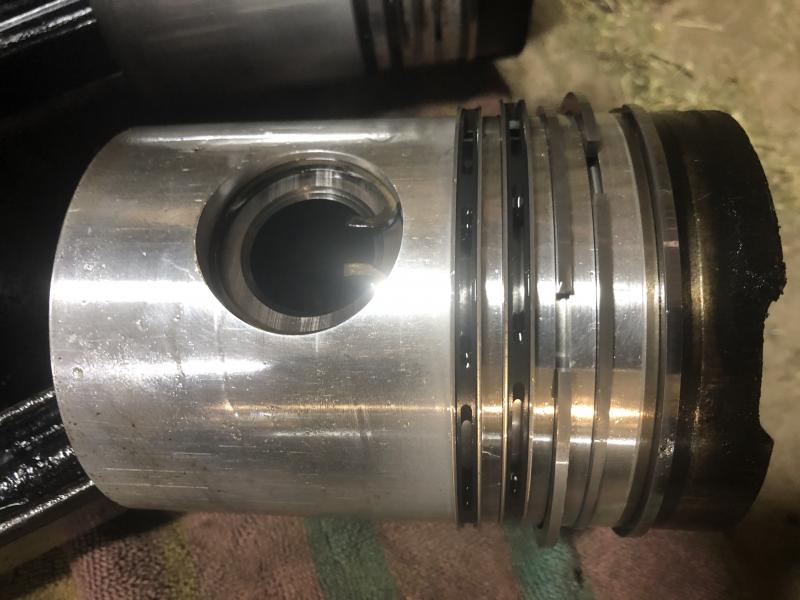
Next is pictures of the pistons/rings/liners. To my untrained eye.... look brand new. Liners also have x hatching still and no stains
First one is the oil pan/clutch housing. Looks like hell. I have had a difficult time keeping my wet clutch without water mix yuck. I think I finally found where it comes from. When I broke the pan free from the block a good amount of clear water came out. It came from the cavity in the end of the oil pan. Is there supposed to be a gasket there? If you look close at the top of the picture you will see a slight gap the is the interior of the clutch housing. I need to make sure that this is solved prior to reassembly
The next photos are of the one destroyed cylinder stud. I have heated it twice... not really hot. Just propane tank and pb blaster. Not giving any signs of loosening. Recommendations? Cutting torch to heat it. Should I heat the block? Other thought would be to weld a sizable nut toward the face of the block. That always works for rusted broken bolts. I just don’t know about doing that so close to the block.
Next is pictures of the pistons/rings/liners. To my untrained eye.... look brand new. Liners also have x hatching still and no stains
Please Log in or Create an account to join the conversation.
- Forum
- Antique Caterpillar Machinery Owners Club
- DISCUSSION
- 933 Traxcavator d311 engine coolant level changes....head drains
Time to create page: 0.363 seconds
ACMOC
Antique Caterpillar Machinery Owners Club
P.O. Box 9301
Peoria, IL 61612
(309) 691-5002
cat@acmoc.org
Become a Member!
"I became a member recently because the wealth of knowledge here is priceless."
- Chris R
"I also joined a year ago. had been on here a couple of times as a non-member and found the info very helpful so I got a one year subscription (not very expensive at all) to try it out. I really like all the resources on here so I just got a three year. I think its a very small price for what you can get out of this site."
- Jason N