- Posts: 576
- Thank you received: 50

ACMOC Membership Benefits
- FREE quarterly magazine filled with content about antique Caterpillar machines
- FREE classified listings
- ACMOC store discounts and specials
- Full Bulletin Board Access
- Marketplace (For Sale/Wanted)
- Technical Library
- Post attachments
$44 /year ELECTRONIC
$60 /year USA
$77 /year International
- Forum
- Antique Caterpillar Machinery Owners Club
- DISCUSSION
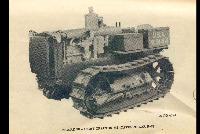
- D2-5U13753 - master pins - please check my understanding
D2-5U13753 - master pins - please check my understanding
6 years 5 months ago #182314
by hfdzl
R2 5E3562 SP U.S.A. W.9151
R2 5E3563 SP U.S.A. W.9152
Replied by hfdzl on topic D2-5U13753 - master pins - please check my understanding
Keep the tension on, GENTLY warm up hub, evenly. Say 150' -200` Heat will make the hub expand just a few thou.
R2 5E3562 SP U.S.A. W.9151
R2 5E3563 SP U.S.A. W.9152
Please Log in or Create an account to join the conversation.
- Potato Head
-

- Offline
- Premium Boarder
- Member
Less
More
- Posts: 82
- Thank you received: 3
6 years 5 months ago #182316
by Potato Head
Replied by Potato Head on topic D2-5U13753 - master pins - please check my understanding
You are certainly energetic. When you get to a place where you need a break, come on down and hlep me put mine back together.
Please Log in or Create an account to join the conversation.
6 years 5 months ago #182335
by neil
Cheers,
Neil
Pittsford, NY
Replied by neil on topic D2-5U13753 - master pins - please check my understanding
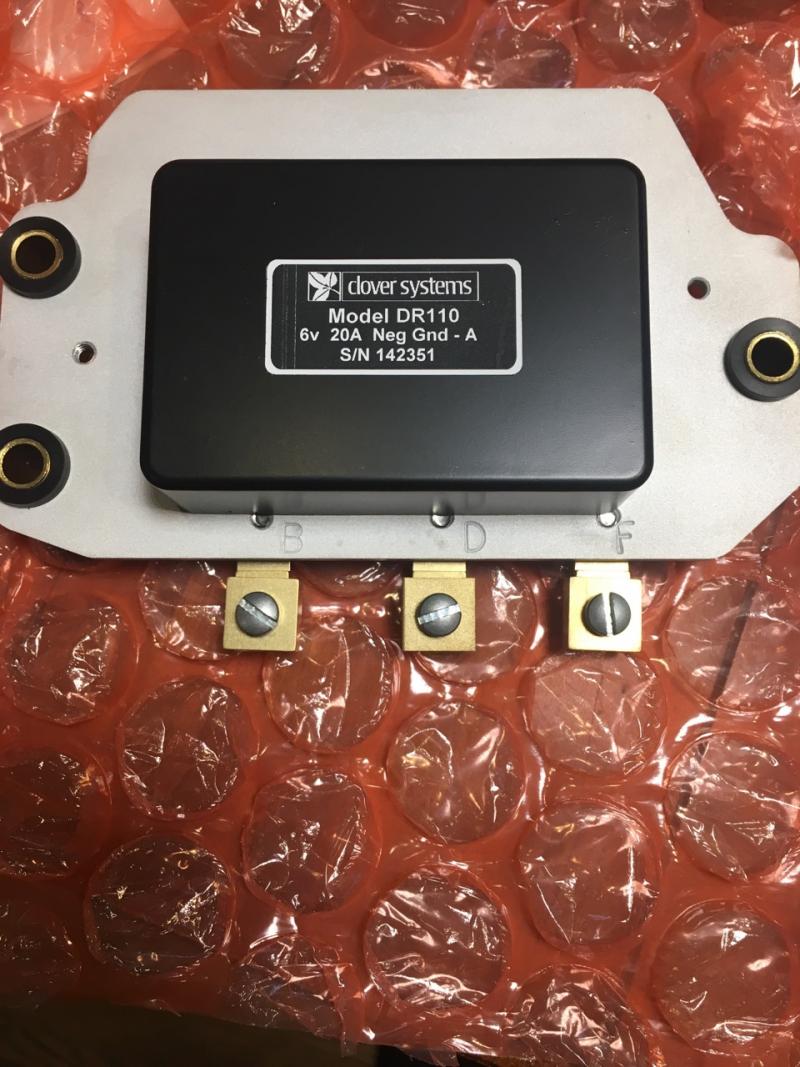
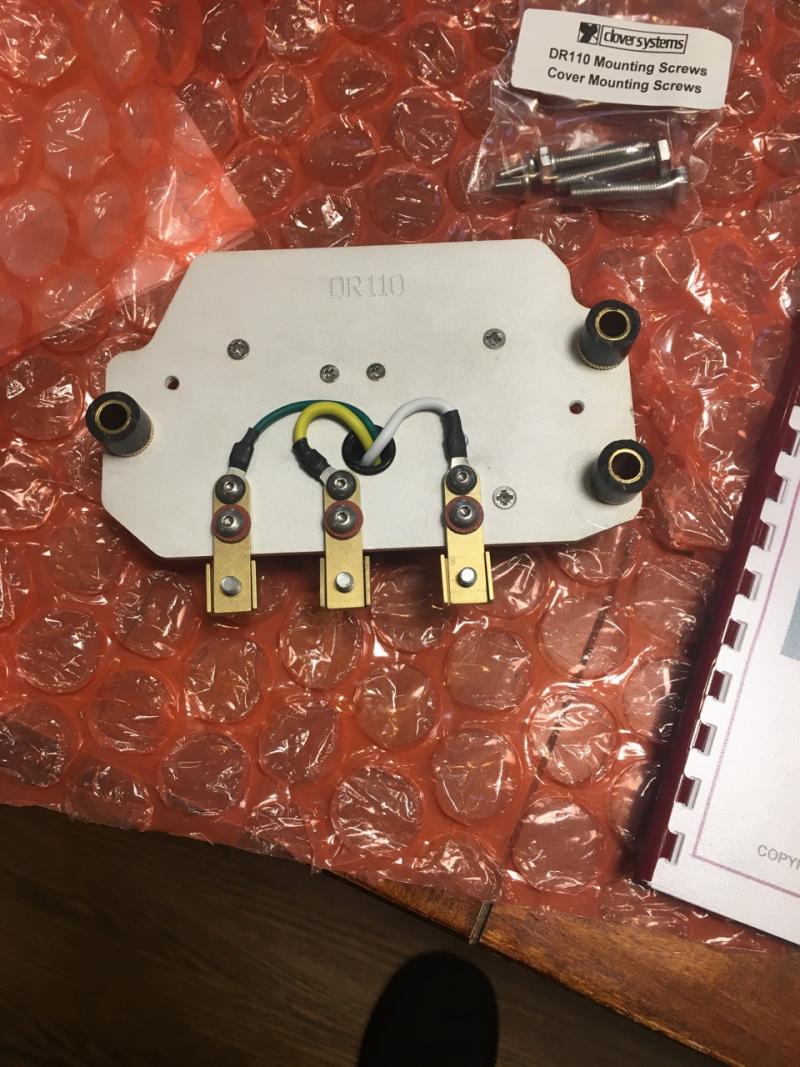
I started heating it the other night with the Mapp gas until I got bored (meaning, my wife told me to come in for dinner : ). I'll take another shot at it tomorrow but I have a thinner 20t ram coming which I'm sure will give me more oomph.
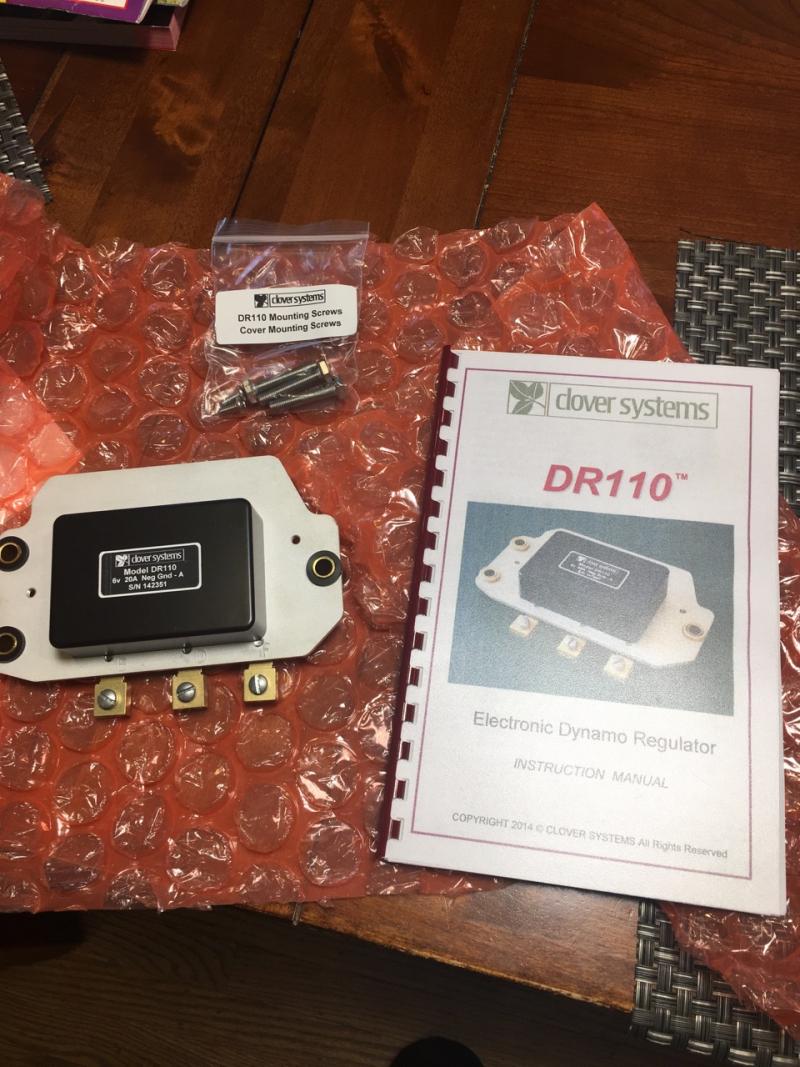
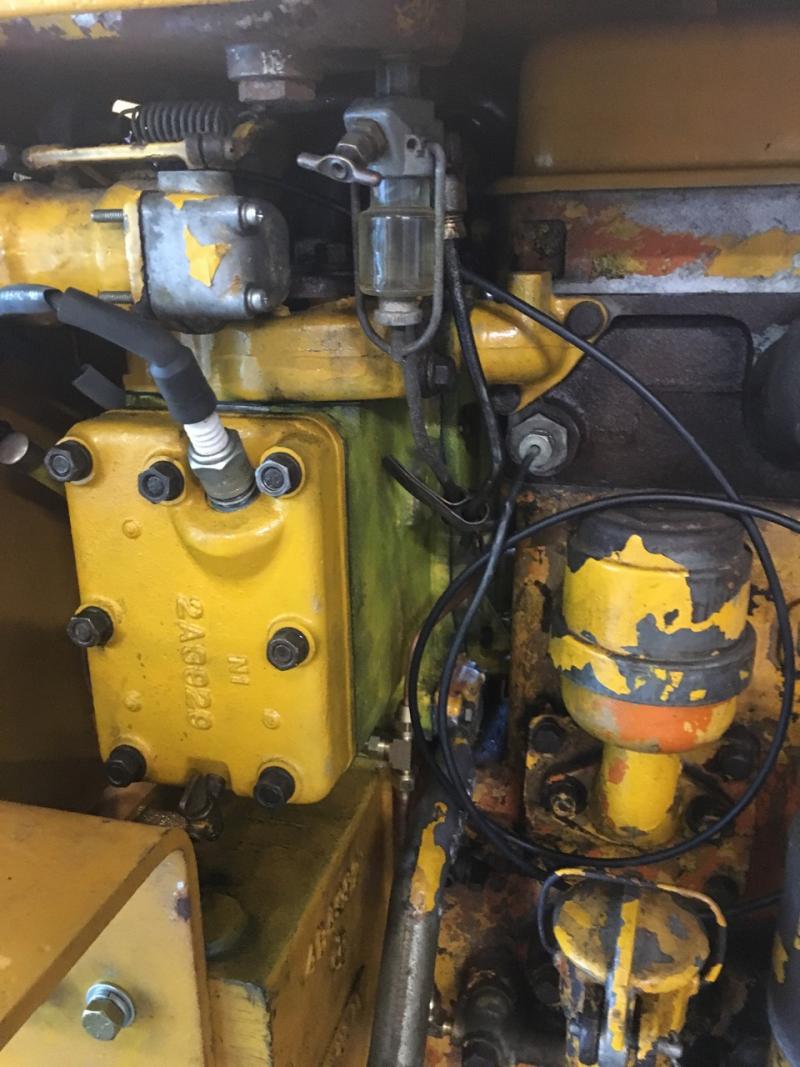
I fitted up the new electronic regulator tonight. My old cover doesn't quite match up with the screw holes so I'll tinker with that tomorrow too.
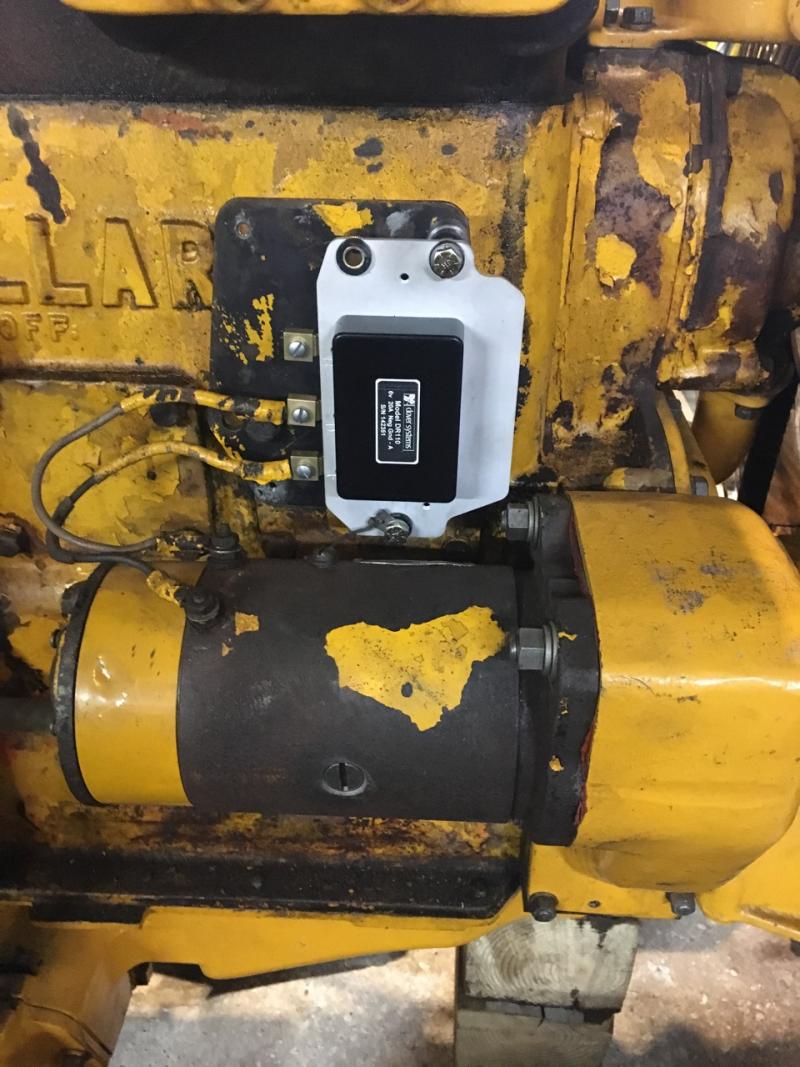
I fitted up the new electronic regulator tonight. My old cover doesn't quite match up with the screw holes so I'll tinker with that tomorrow too.
Cheers,
Neil
Pittsford, NY
Please Log in or Create an account to join the conversation.
6 years 5 months ago #182358
by drujinin
Replied by drujinin on topic D2-5U13753 - master pins - please check my understanding
I've read a little bit about those newer regulators.
Is the price reasonable? Did you find that on the Web?
Is the price reasonable? Did you find that on the Web?
Please Log in or Create an account to join the conversation.
6 years 5 months ago #182359
by neil
Cheers,
Neil
Pittsford, NY
Replied by neil on topic D2-5U13753 - master pins - please check my understanding
It's a lot cheaper to buy a replacement mechanical regulator, $30 vs. $110 but I'm more interested in trying things like this out. They're at
cloversystems.com
Cheers,
Neil
Pittsford, NY
Please Log in or Create an account to join the conversation.
6 years 5 months ago #182561
by neil
Cheers,
Neil
Pittsford, NY
Replied by neil on topic D2-5U13753 - master pins - please check my understanding
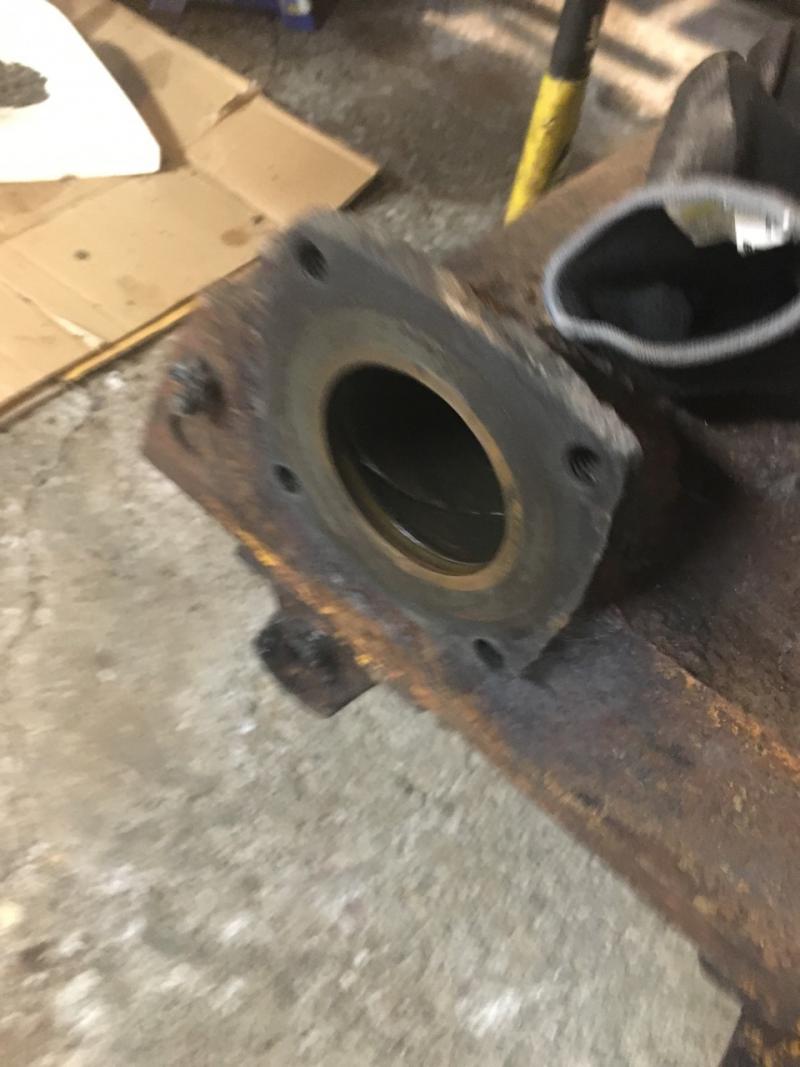
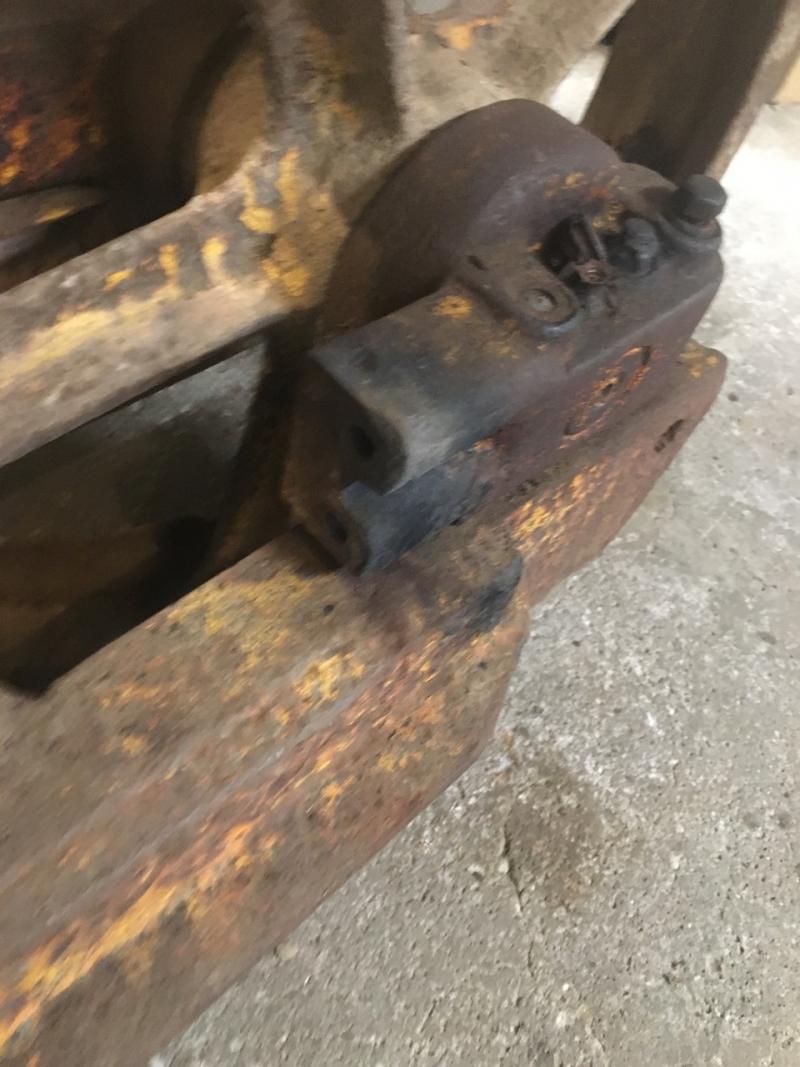
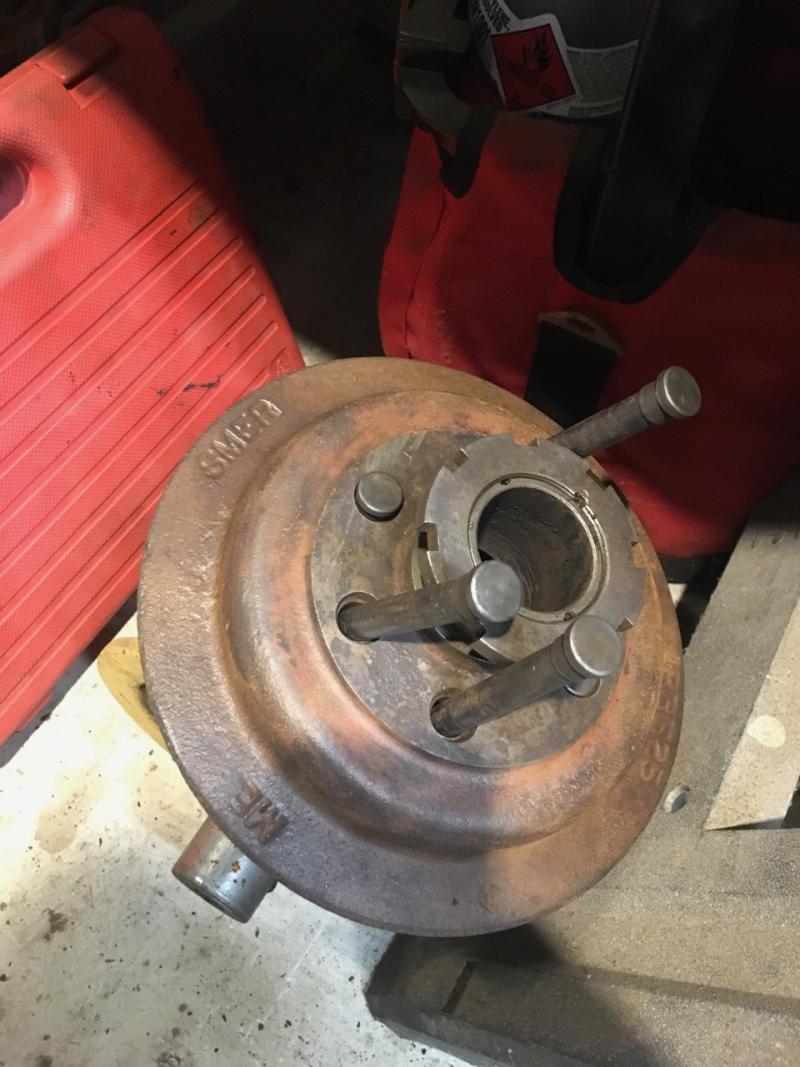
More progress - the thinner 20t ram fit between the bolts and popped the sprocket off at 7.5 tons if my math is correct (7500psi and piston area of 2.46 square inches). That means I was not achieving that pressure on my OTC 938 17t push-puller cranking it up with a 24" crescent. That surprised me but it's good to know now. The components might be good for 17t but I can't crank it up that high.
Had to weld nuts onto a couple of the final bolts and one of the sprocket gear cover bolt to get them out but everything else came out ok. Sprocket seal looks ok and the inside of the brake/clutch chamber is full of grease so hopefully all those parts will come apart easy. That said, I'm still going to replace the brake drum and the clutch hub unless they're perfect spline-wise because of how good steering is when those components are brand-new. Seals and bearings unless they're perfect too.
There's no easy way to pull the final from the transmission case because it's not set up for forcing screws or any kind of leverage. I guess they assumed it would just come apart easily. I set a jack between the sprocket gear case and the trans case and that moved it on that side but I'm not sure how I'm going to move the other side. Thinking I might pick up a 5t jack that might be small enough to fit in between a boss on the case and a lug on the pivot shaft boss and push it off that way. Couple of forcing bolt holes would have been nice. Might even install some myself for next time.
Cheers,
Neil
Pittsford, NY
Please Log in or Create an account to join the conversation.
6 years 4 months ago #183175
by neil
Cheers,
Neil
Pittsford, NY
Replied by neil on topic D2-5U13753 - master pins - please check my understanding
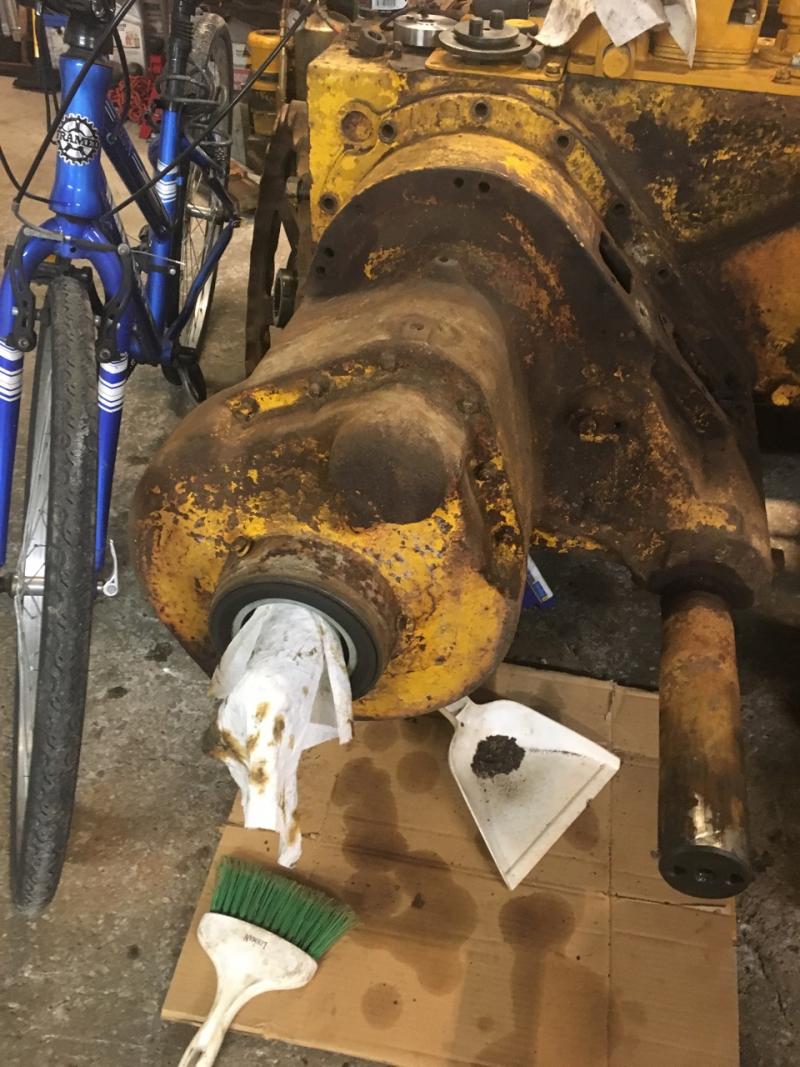
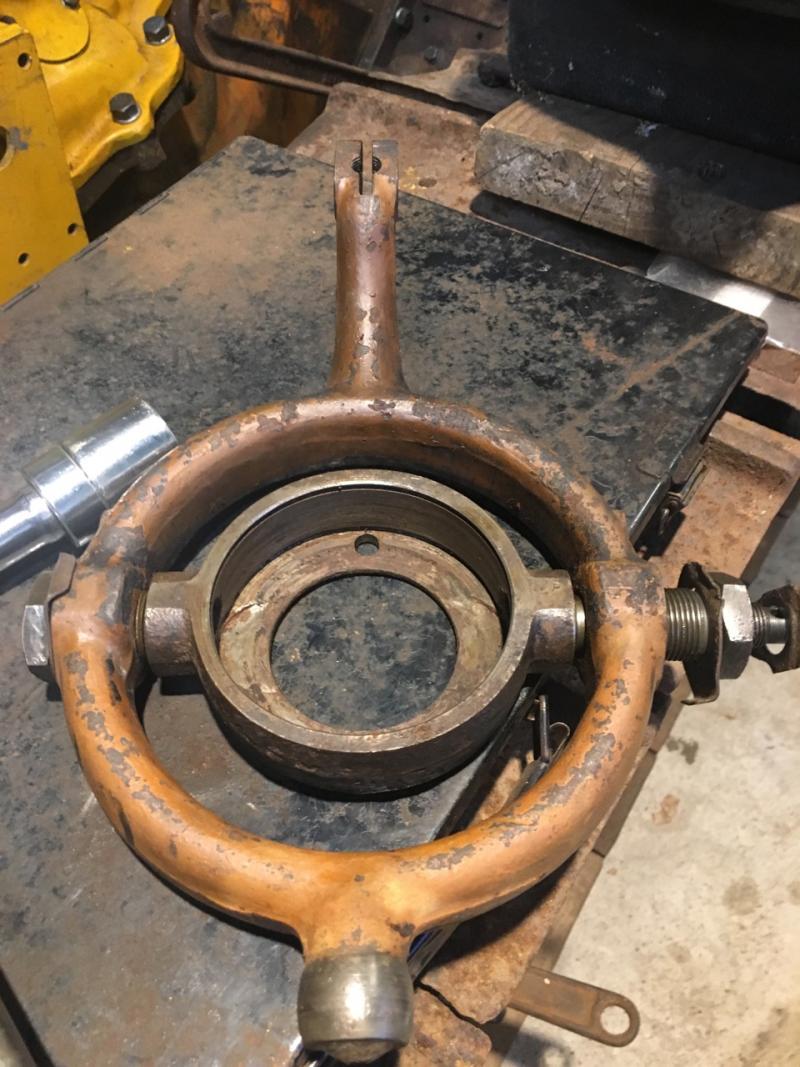
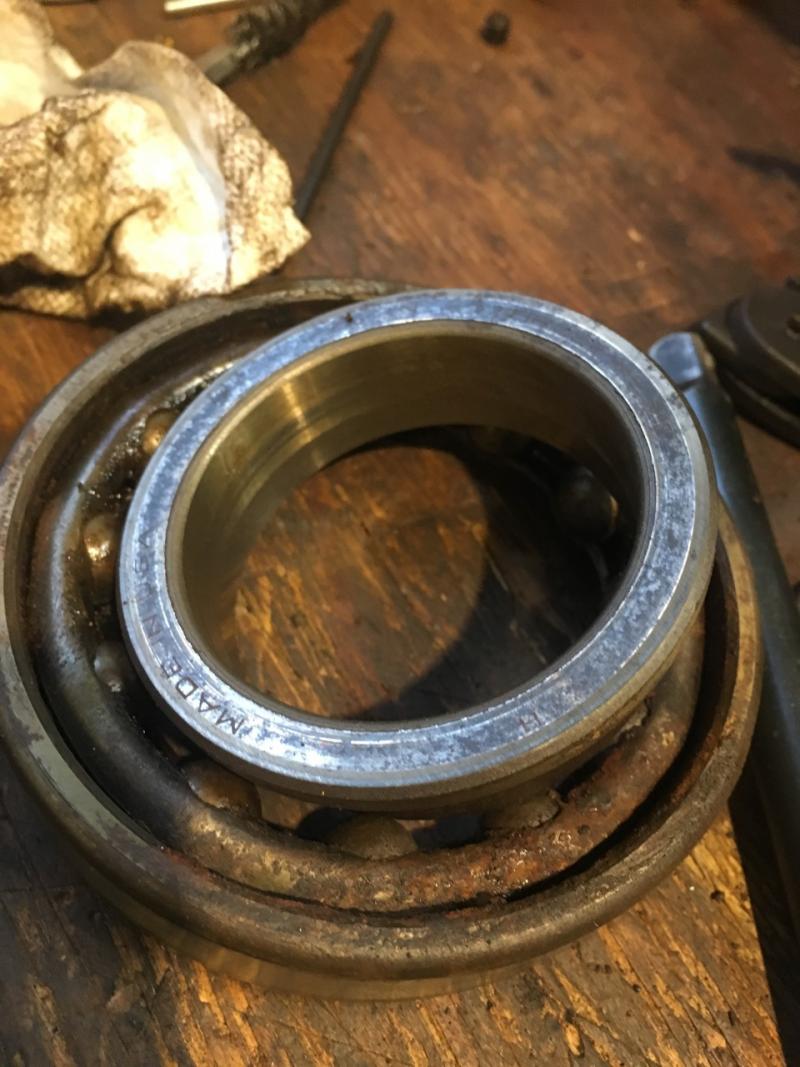
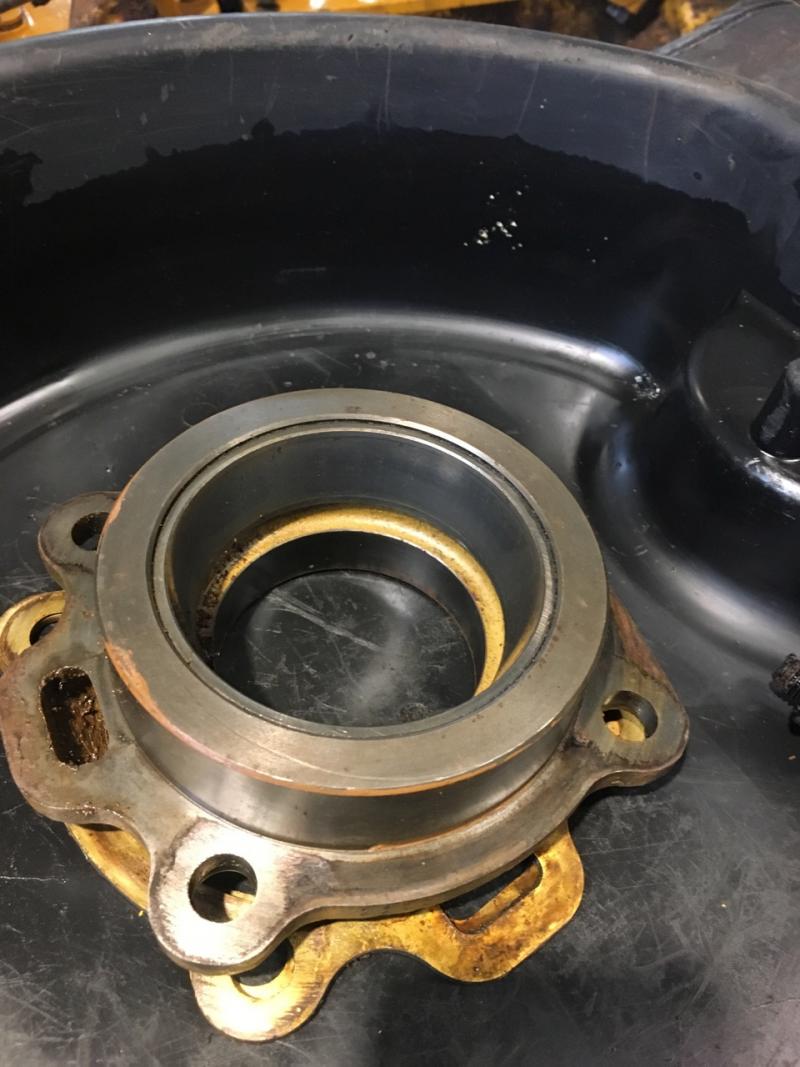
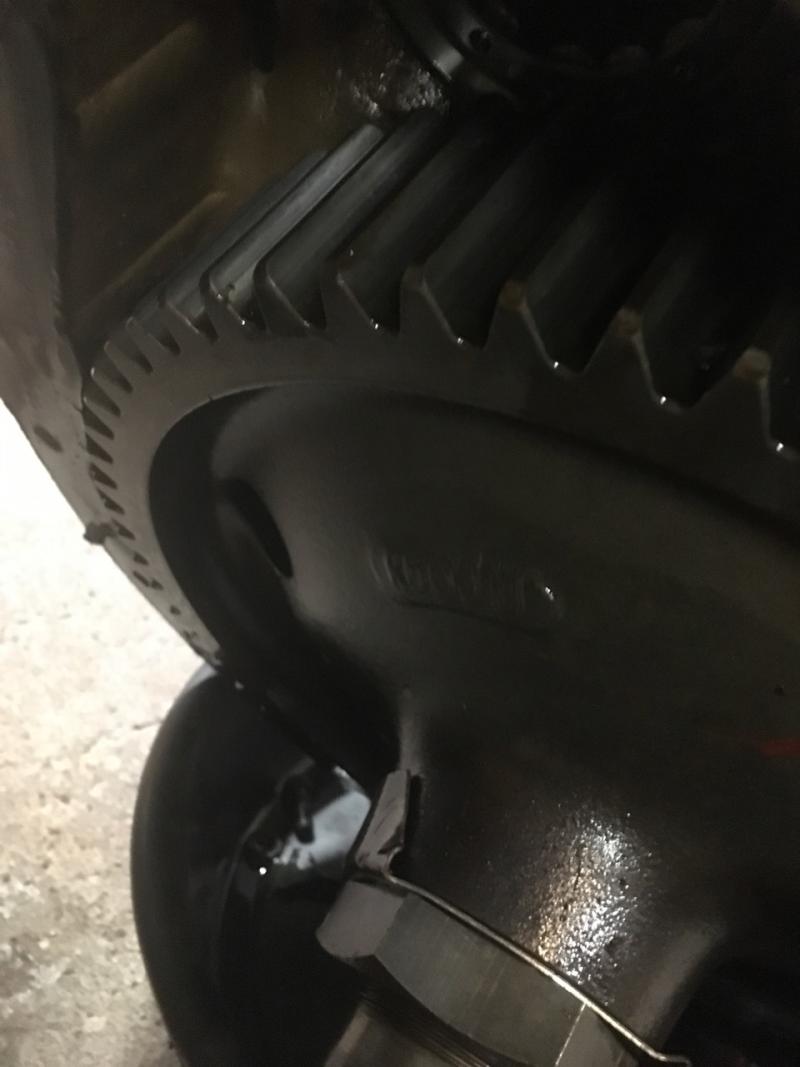
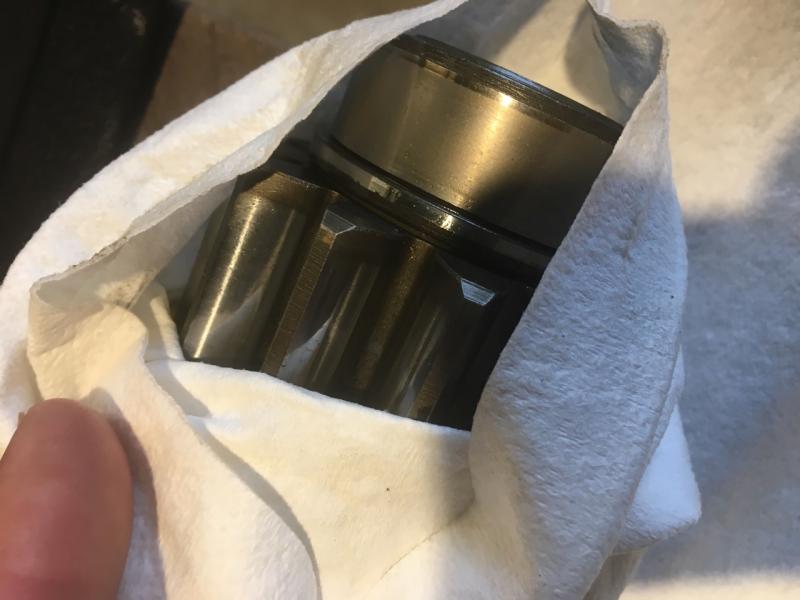
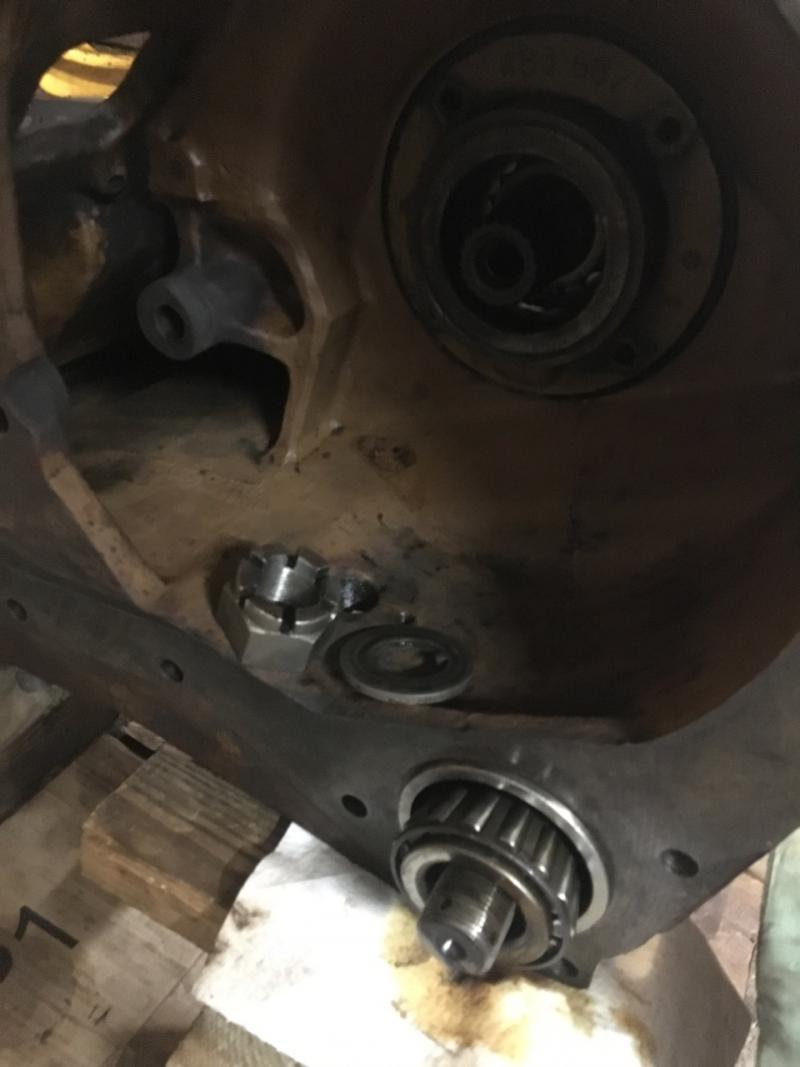
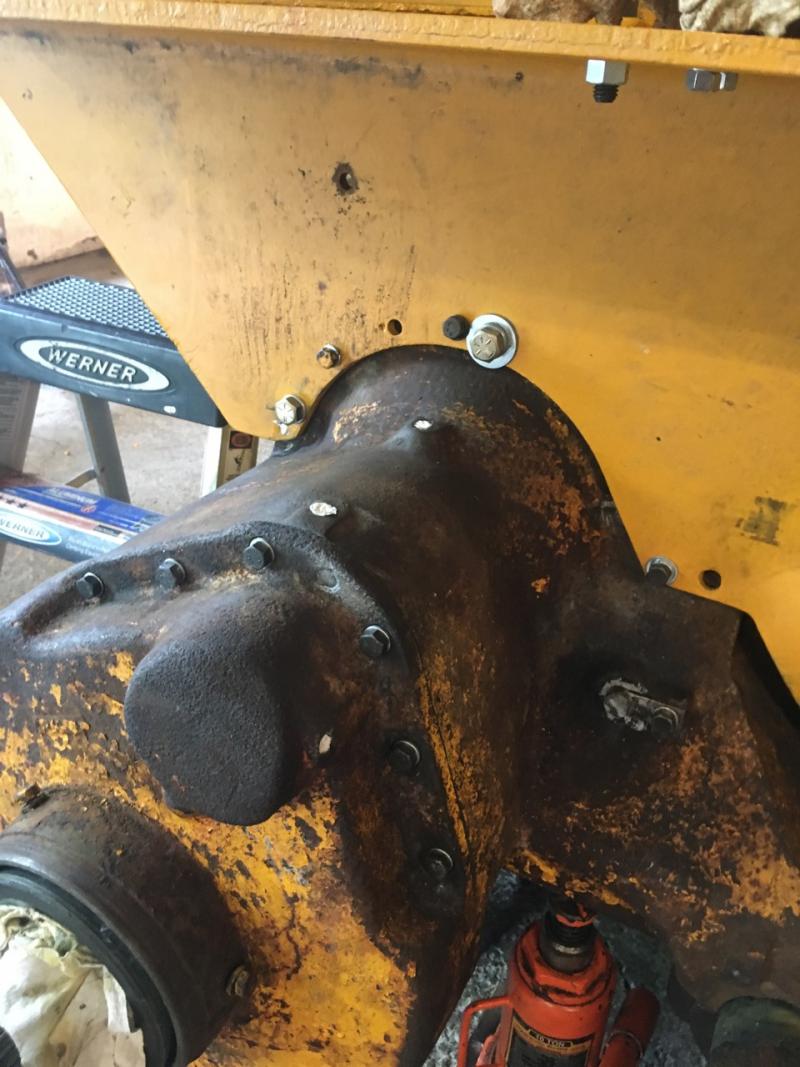
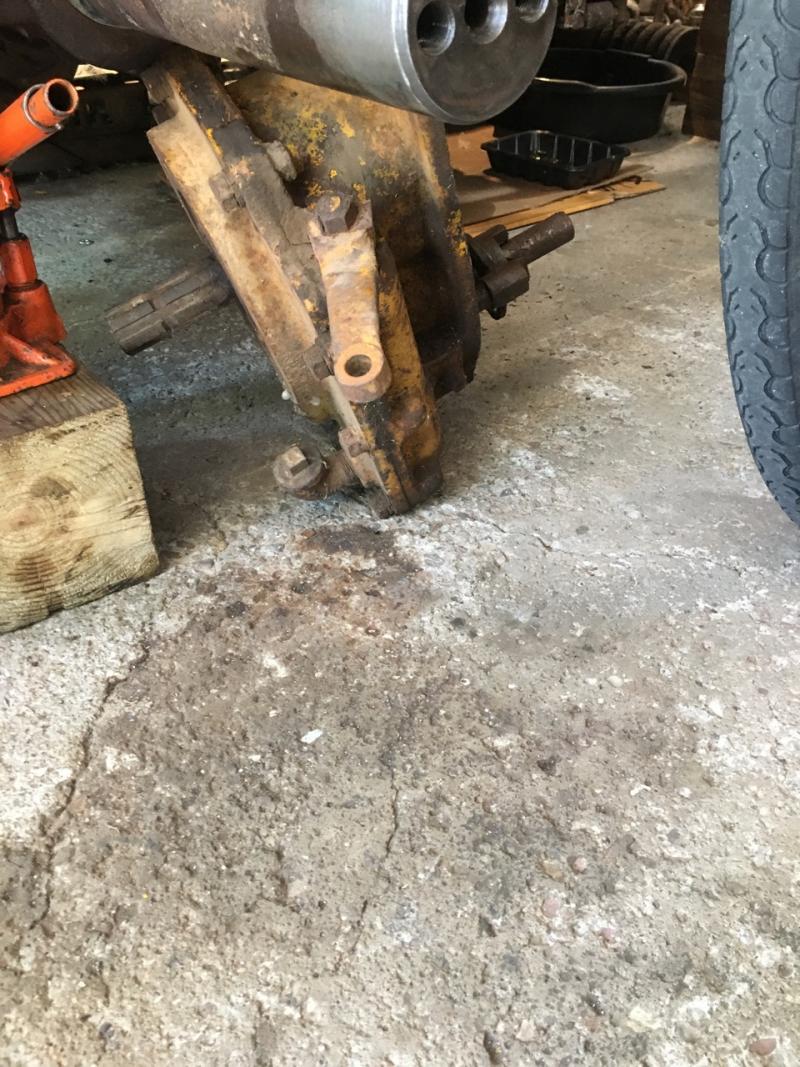
Boy it's good to have the right tools, and to not have components rusted and seized up. The right side is just falling apart during disassembly. Removed the inner and outer hubs and sent them to Potato and have my new ones coming from General Gear plus springs and such. All of the inner springs were broken while the outers were intact.
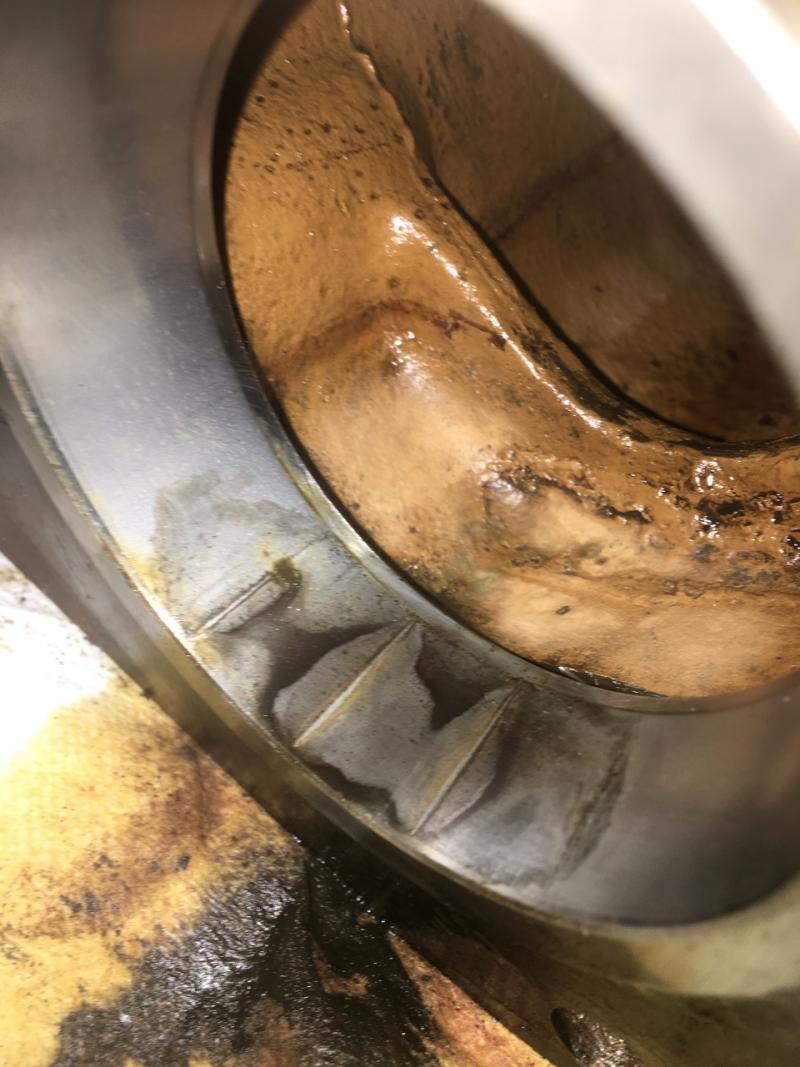
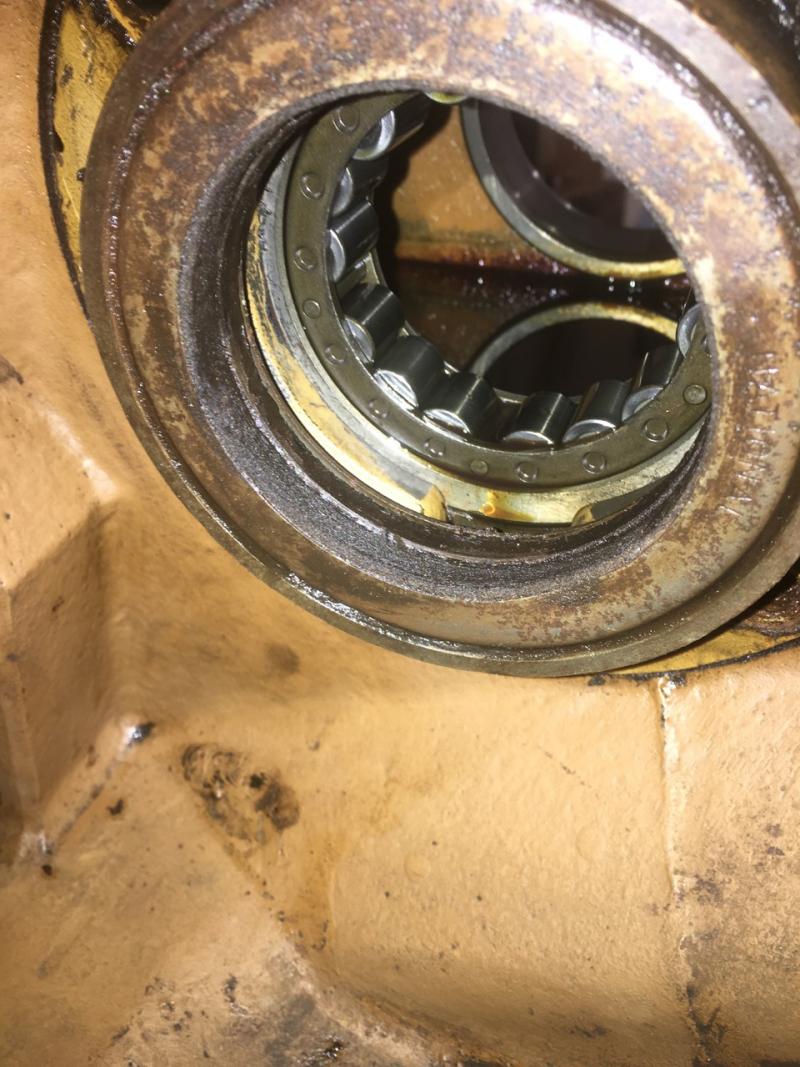
Right side bevel gear shaft bearing rusted and powdery just like the left side. Right side final bearings look worn but not actually damaged except for the inner sprocket shaft race which was stained. The thrust bearing was fully rusty. So, replace all bearings. That will make every bearing in this unit new except for the two steering clutch needle bearings that sit inside that 90 degree actuation arm. They're tight - probably rusty but I've squirted some oil in there and I may get around to them at some stage.
This steering clutch was less rusted than the left side and the lined plates were largely intact but the steel driving plates were toast. The brake band was still intact so that's gone to the local shop to be relined.
The bellows seal surface looks alright and it didn't show any sign of leaking so I'd assume I'm ok to redeploy it?
Cheers,
Neil
Pittsford, NY
Please Log in or Create an account to join the conversation.
6 years 4 months ago #183311
by d2gary
Replied by d2gary on topic D2-5U13753 - master pins - please check my understanding
Nice to see you got some good luck. A lot more fun to just disassemble than to fight the rust
Please Log in or Create an account to join the conversation.
6 years 2 months ago #187022
by neil
Cheers,
Neil
Pittsford, NY
Replied by neil on topic D2-5U13753 - master pins - please check my understanding
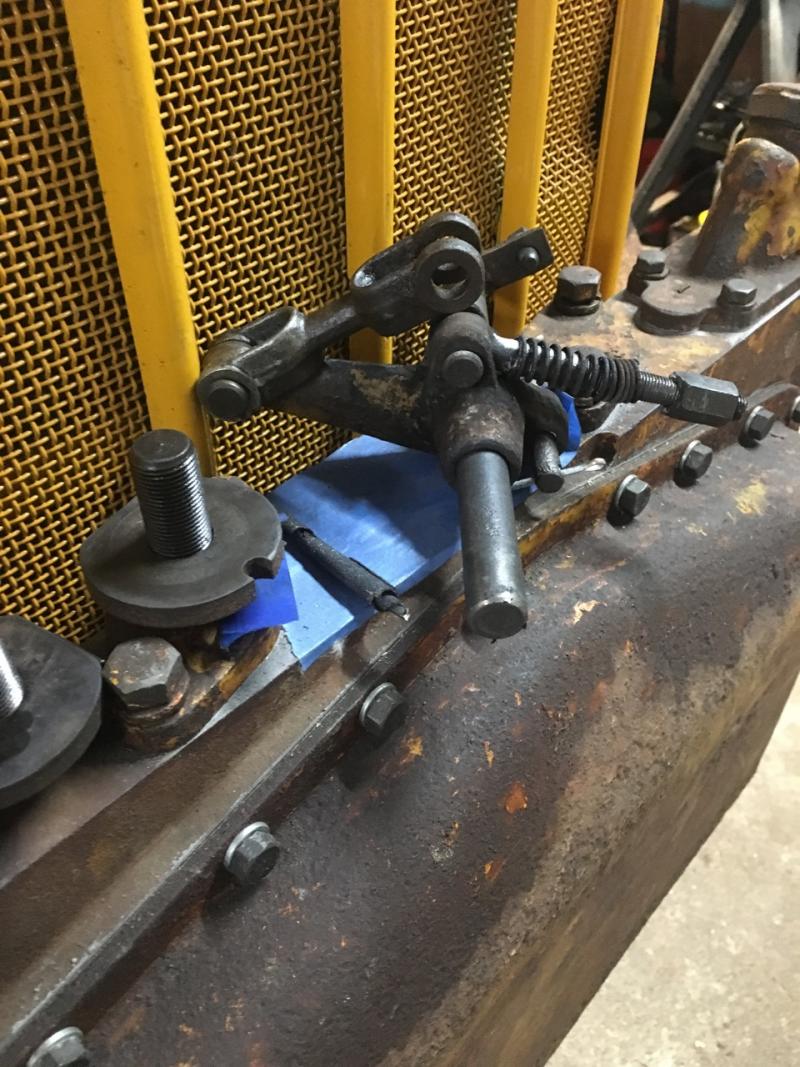
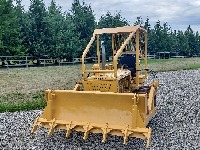
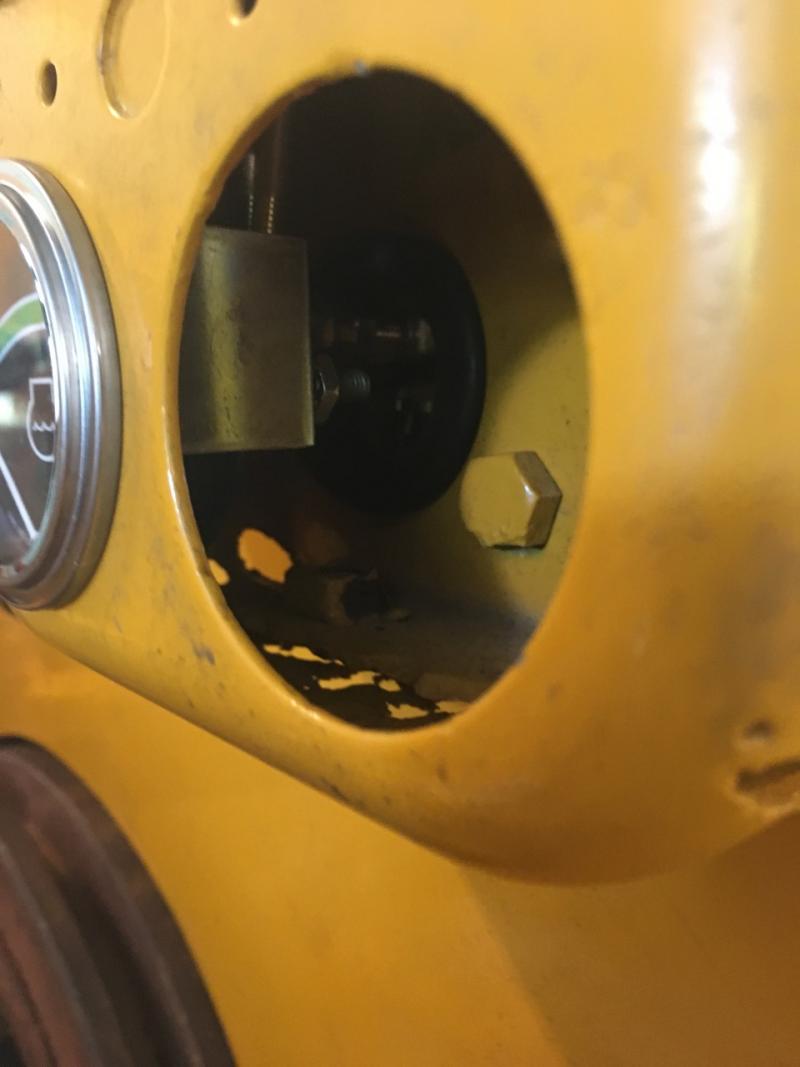
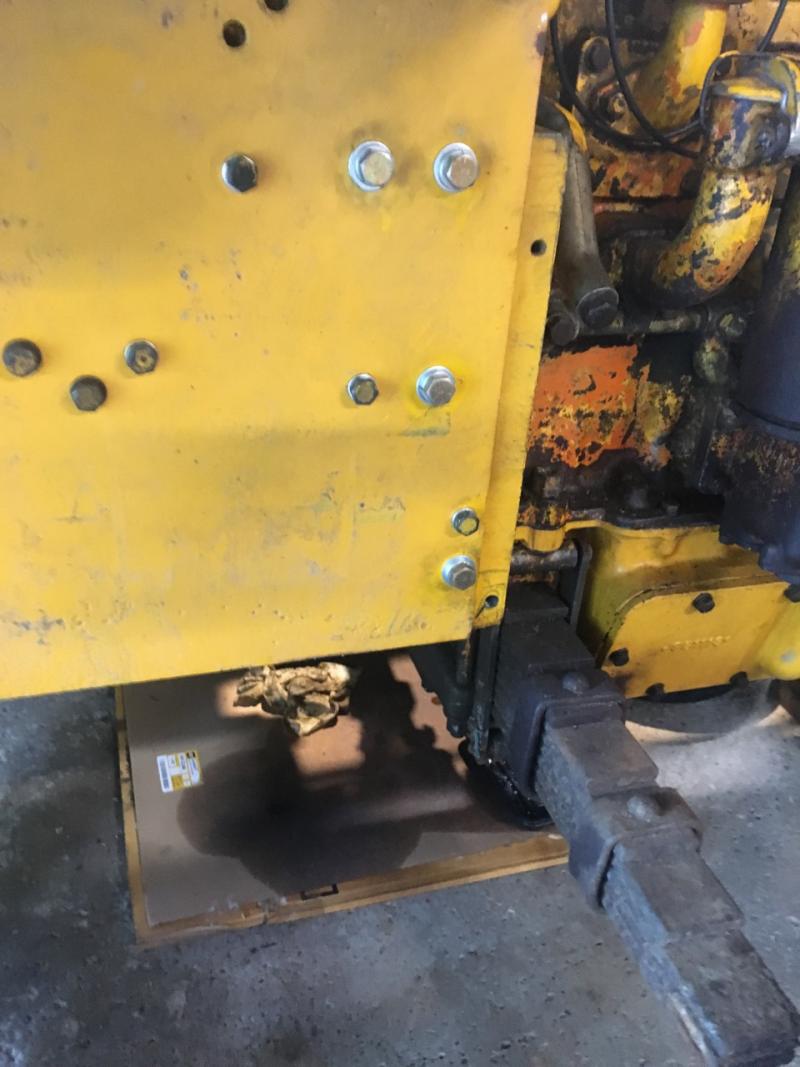
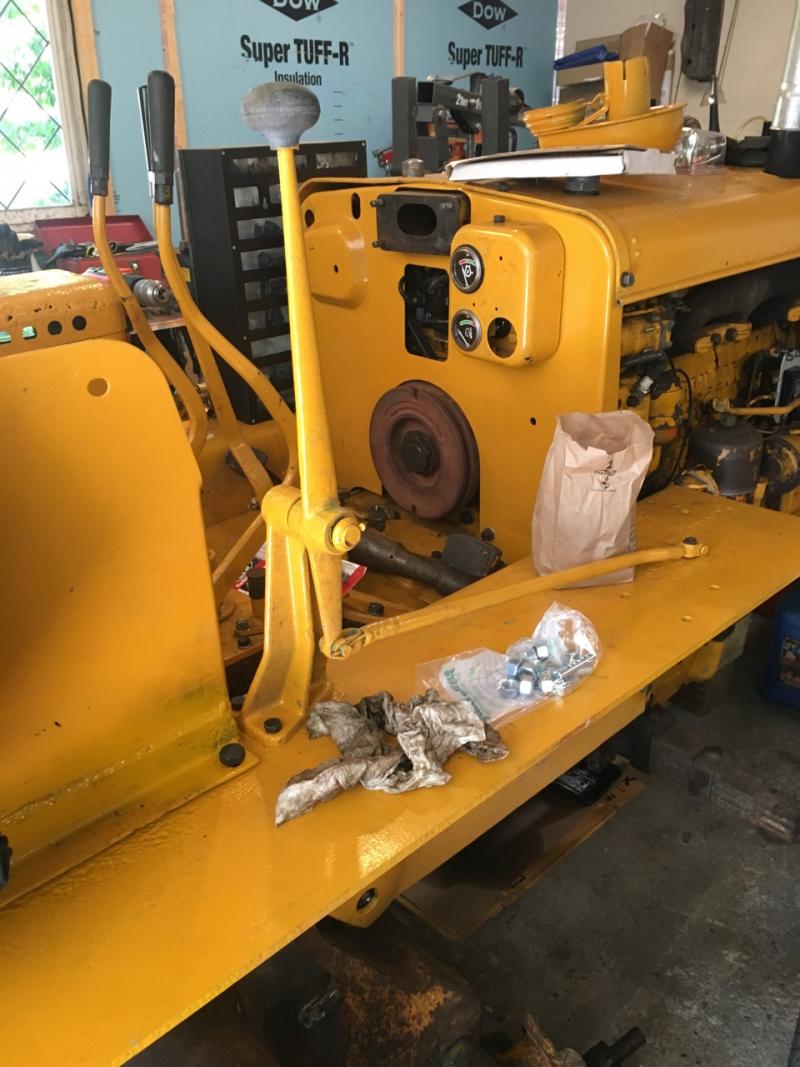
Making more progress. Both fenders are back on - the holes in the finals that the fenders bolt to were all flogged out. On one side I installed EZ-Loks with a 9/16 coarse external thread and the inner is the OEM 3/8-16. On the right side I installed 9/16 fine bolts instead. I will see which approach holds up. Dash is in. Complication here is that neither the current model oil pressure gauge nor the temp gauge are able to be installed like original, mainly due to the temp gauge. The hole in the firewall lines up with the bottom gauge opening. Normally the oil gauge would go here but because I didn't want to put a tight bend in the bourdon tube, I elected to put the temp gauge there, and ran the tube out across the top of the pony manifold - normally it would skirt down the back of the firewall.
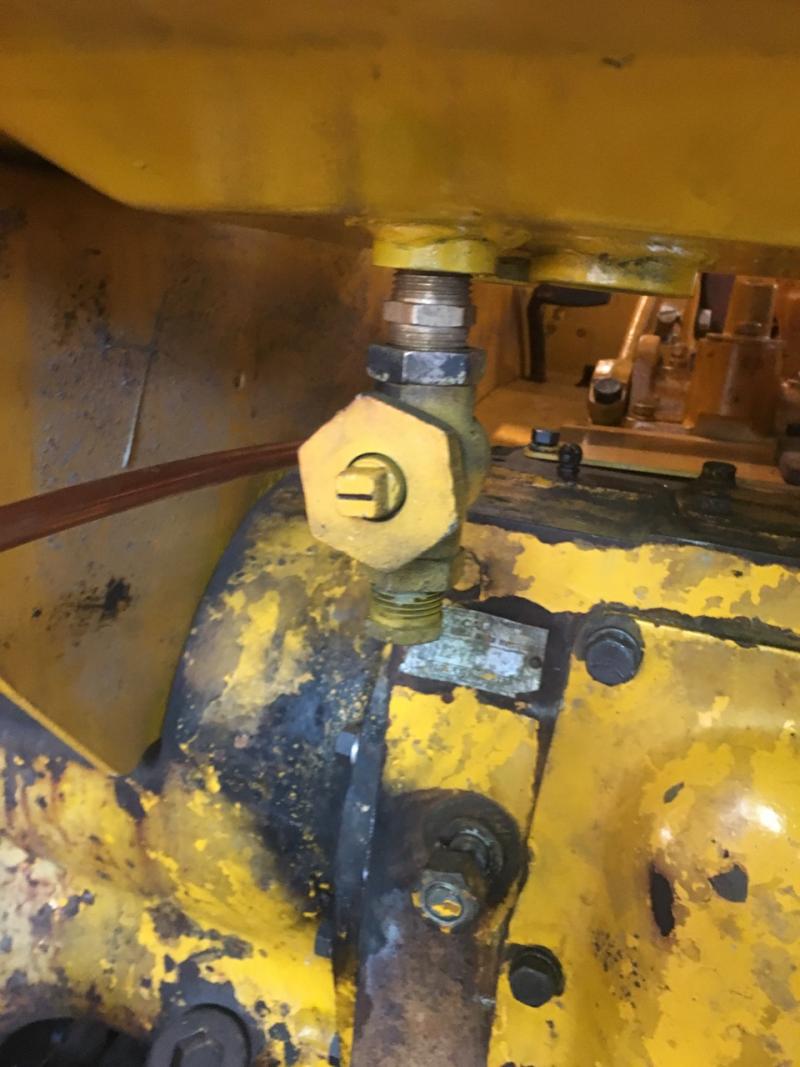
Tank is on after some r-n-r on the mounts which had cracked. Currently working on getting the breather fixed up (see other thread). Right final is done. Also noticed that there is a helpful line across the tank drain valve that shows when it's closed.
Next step is to bore out the broken blade mounting lug nuts from the track frames, and patch up the frames as best I can - they're really junk but I can't find replacements.
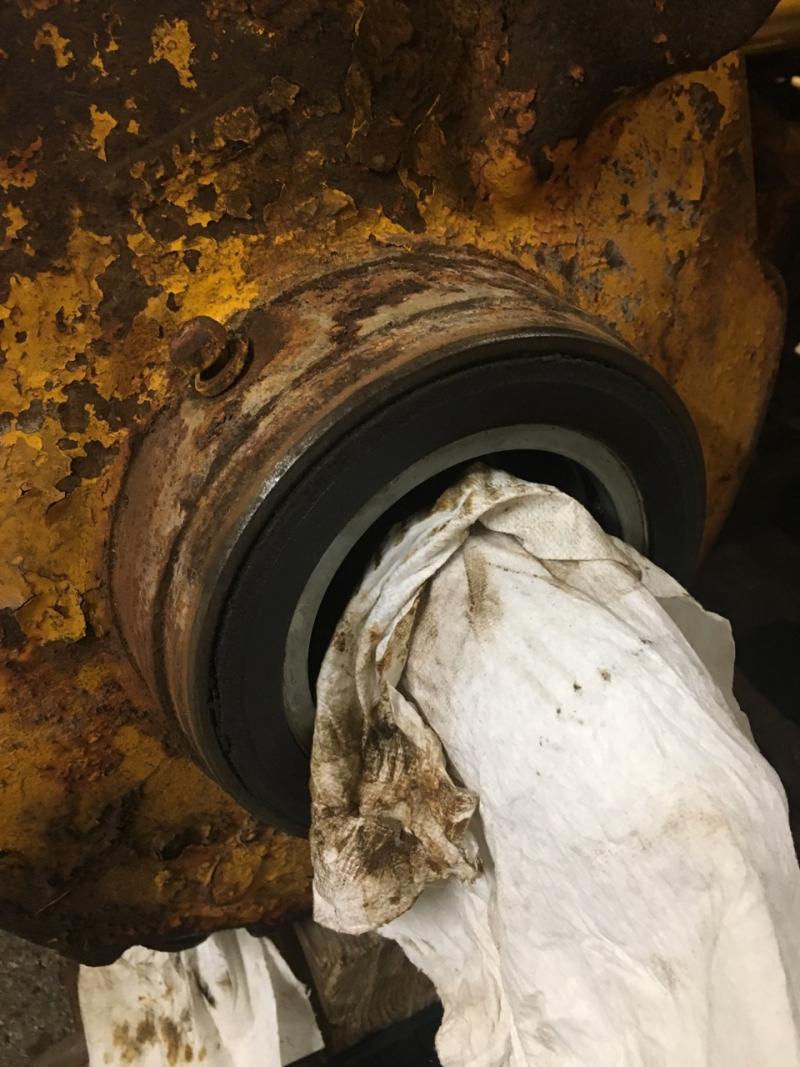
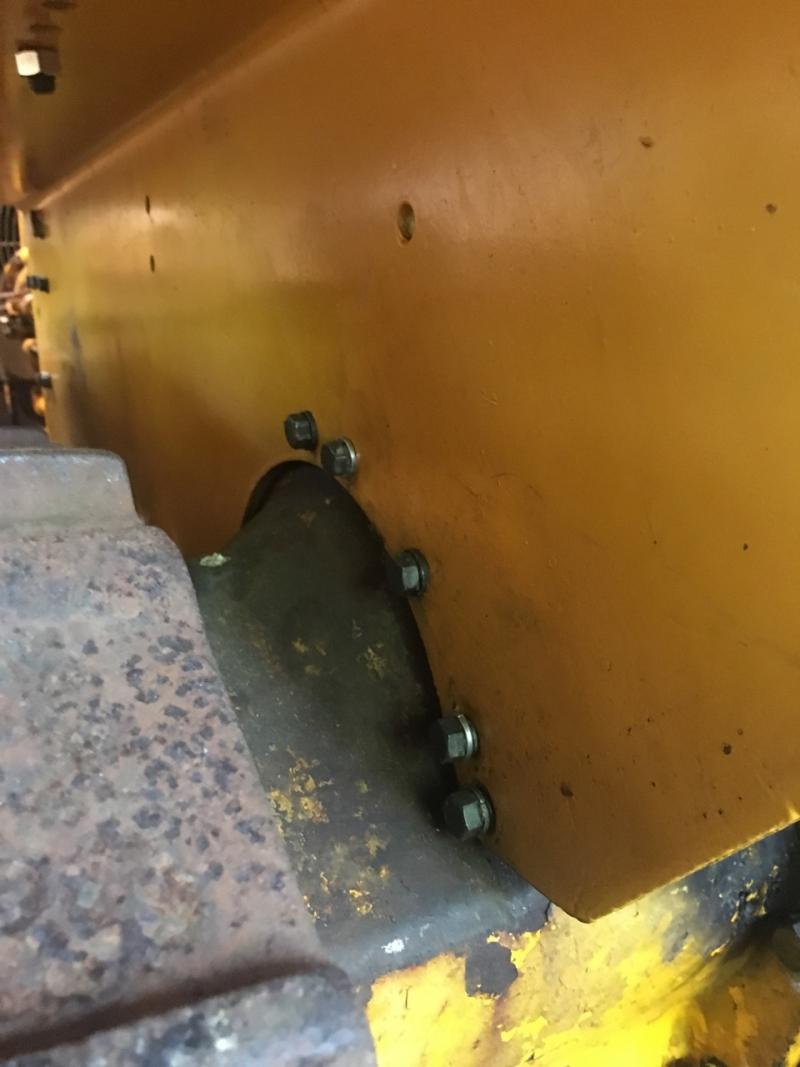
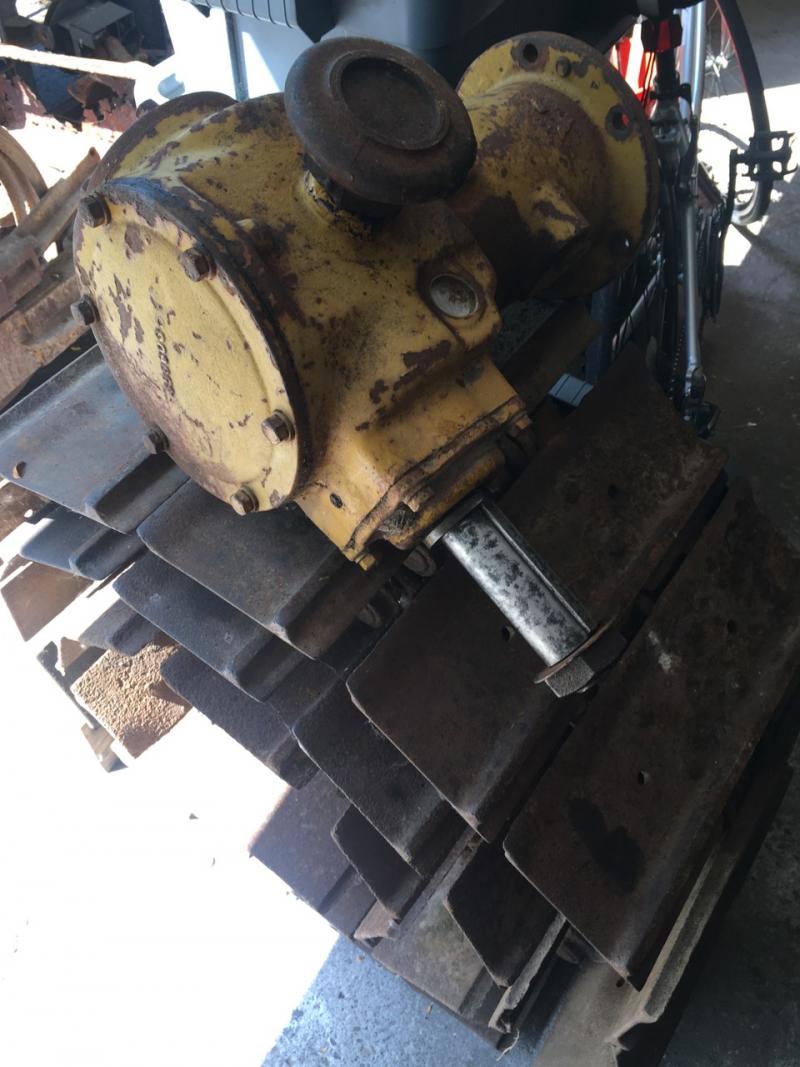
PTO and belt pulley are being installed in order to run it on Norm's rock crusher at the Canandaigua show hopefully. Also, look at the wear on this idler. I'm assuming this is telling me that the rail was running off to one side of it?
Tank is on after some r-n-r on the mounts which had cracked. Currently working on getting the breather fixed up (see other thread). Right final is done. Also noticed that there is a helpful line across the tank drain valve that shows when it's closed.
Next step is to bore out the broken blade mounting lug nuts from the track frames, and patch up the frames as best I can - they're really junk but I can't find replacements.
PTO and belt pulley are being installed in order to run it on Norm's rock crusher at the Canandaigua show hopefully. Also, look at the wear on this idler. I'm assuming this is telling me that the rail was running off to one side of it?
Cheers,
Neil
Pittsford, NY
Please Log in or Create an account to join the conversation.
6 years 2 months ago #187030
by d2gary
Replied by d2gary on topic D2-5U13753 - master pins - please check my understanding
Looking good Neil. I'm curious about how you will be going to paint when work is complete. I see you are painting some pieces as you go. Are you planning on a partial disassembly or just try to hose everything as a unit? I've asked various people and get various answers.
It would be interesting to know what happened at the CAT factory. My main concern is that if it's painted as component pieces and assembled the bolts wouldn't be painted. I'm a ways from paint but since you're closer thought I would ask.
It would be interesting to know what happened at the CAT factory. My main concern is that if it's painted as component pieces and assembled the bolts wouldn't be painted. I'm a ways from paint but since you're closer thought I would ask.
Please Log in or Create an account to join the conversation.
- Forum
- Antique Caterpillar Machinery Owners Club
- DISCUSSION
- D2-5U13753 - master pins - please check my understanding
Time to create page: 0.506 seconds
ACMOC
Antique Caterpillar Machinery Owners Club
P.O. Box 9301
Peoria, IL 61612
(309) 691-5002
cat@acmoc.org
Become a Member!
"I became a member recently because the wealth of knowledge here is priceless."
- Chris R
"I also joined a year ago. had been on here a couple of times as a non-member and found the info very helpful so I got a one year subscription (not very expensive at all) to try it out. I really like all the resources on here so I just got a three year. I think its a very small price for what you can get out of this site."
- Jason N