- Posts: 2475
- Thank you received: 2

ACMOC Membership Benefits
- FREE quarterly magazine filled with content about antique Caterpillar machines
- FREE classified listings
- ACMOC store discounts and specials
- Full Bulletin Board Access
- Marketplace (For Sale/Wanted)
- Technical Library
- Post attachments
$44 /year ELECTRONIC
$60 /year USA
$77 /year International
- Forum
- Antique Caterpillar Machinery Owners Club
- DISCUSSION
- D2-5U13753 - master pins - please check my understanding
D2-5U13753 - master pins - please check my understanding
6 years 2 months ago #187695
by STEPHEN
Lever is just press fit. The paint? What kind did you use? You might try some solvent on a q tip and rub the tag with the end of a wood dowel. Brush cleaner works ok, it is a blend of different solvents so some component might soften the paint.
From my electric motor days: coat the tag with hard grease as a resist, or after you paint everything, hit the tag again to get it fresh, then clean it with a rag.
Replied by STEPHEN on topic D2-5U13753 - master pins - please check my understanding
Another question for the knowledgeable. I had the air cleaner painted and there's some overspray on the aluminum label. What's a good way to remove the paint without wrecking the label?
Also, I want to disassemble the main governor control that's mounted on the air cleaner. I can see a keyway but no pin or other retainer. How are the lever and the arm fixed to the shaft? Press fit?
Lever is just press fit. The paint? What kind did you use? You might try some solvent on a q tip and rub the tag with the end of a wood dowel. Brush cleaner works ok, it is a blend of different solvents so some component might soften the paint.
From my electric motor days: coat the tag with hard grease as a resist, or after you paint everything, hit the tag again to get it fresh, then clean it with a rag.
Please Log in or Create an account to join the conversation.
4 years 7 months ago #212084
by d2gary
Hey Neil I was rereading through this old post and saw the picture of the speedi sleeve on your pivot shaft. Just measured my spare shaft and it is only .002 to .003 out so no build up on the bushing surface but the seal surface is shot. The machinist suggested welding and spinning the shaft and using an angle grinder to bring it to close enough. I dont have a problem with this method but if I can use the speedi sleeve I'd be happy with it. I would probably clean and fill the grooves with jb weld and sleeve. So the magic question is how difficult was it to slide the sleeve that far down the shaft? Also do you still have part numbers for the sleeve? Thanks for any info
Replied by d2gary on topic D2-5U13753 - master pins - please check my understanding
Some more progress. Very enjoyable when parts are reassembled with new hardware and chased threads, everything lubed and shinied up. Left-side final and brake assembly reinstalled with new bearings, seals, hardware, etc. I used caulk instead of cork, because a) it rhymes, and b) it'll probably seal better. Rolls very smoothly. This side has new clutch hubs and plates from General Gear. The steering lever rebound springs were frozen up so they're all free now and working as expected. Speedi-sleeve on the pivot shaft for the seal, E-Z Loks in the final housing for the fender. Welded a new thread on the gear lever so I fit a new knob.
Tested out the clutch after fitting the left side - very satisfying. The clutch lever has a stop adjustment on it, that I adjusted to limit lever travel to just before the clutch bottoms out on the springs, which I presume is close to what it needs. It has 3" of free play when engaged. Brake works like new. New bellows seal.
I'll put the unrefurbished left track frame on next week so I can turn the tractor around and refurbish the right steering. I'm going to get my guy to make a couple of pins that are a snug but not tight fit in the rails so I can easily put the tracks on and off while I dick around with the track frames. I was excited because I thought I was buying the old-style master pins with the plugs 2F2565 from Blumaq but they turned out to be the regular and current interference fit pins.
I'm assuming I'll need to adjust the rails but of course, the threads on that long bolt and the nut are frozen / rusted / wasted. Don't really want to replace a whole bunch of stuff on this frame if I can find better ones that are all rusted out but may have to. Presumably those bolts are still available?
Hey Neil I was rereading through this old post and saw the picture of the speedi sleeve on your pivot shaft. Just measured my spare shaft and it is only .002 to .003 out so no build up on the bushing surface but the seal surface is shot. The machinist suggested welding and spinning the shaft and using an angle grinder to bring it to close enough. I dont have a problem with this method but if I can use the speedi sleeve I'd be happy with it. I would probably clean and fill the grooves with jb weld and sleeve. So the magic question is how difficult was it to slide the sleeve that far down the shaft? Also do you still have part numbers for the sleeve? Thanks for any info
Please Log in or Create an account to join the conversation.
4 years 7 months ago #212093
by neil
Cheers,
Neil
Pittsford, NY
Replied by neil on topic D2-5U13753 - master pins - please check my understanding
Hi Gary,
Speedi-Sleeve is 99293 and it was fairly easy to drive it on. I just needed a fairly close fitting tube so that it didn't damage the sleeve. I buttered the eroded areas up with JB Weld and drove the sleeve on, then cleaned up the "overspray". Seems to have worked ok
Speedi-Sleeve is 99293 and it was fairly easy to drive it on. I just needed a fairly close fitting tube so that it didn't damage the sleeve. I buttered the eroded areas up with JB Weld and drove the sleeve on, then cleaned up the "overspray". Seems to have worked ok
Cheers,
Neil
Pittsford, NY
Please Log in or Create an account to join the conversation.
4 years 7 months ago #212170
by d2gary
Thanks Neil
I dont mind welding and grinding but mixing epoxy is a lot easier and for a repair on a shaft that just rocks back and forth I feel like this will work.
Replied by d2gary on topic D2-5U13753 - master pins - please check my understanding
Hi Gary,
Speedi-Sleeve is 99293 and it was fairly easy to drive it on. I just needed a fairly close fitting tube so that it didn't damage the sleeve. I buttered the eroded areas up with JB Weld and drove the sleeve on, then cleaned up the "overspray". Seems to have worked ok
Thanks Neil
I dont mind welding and grinding but mixing epoxy is a lot easier and for a repair on a shaft that just rocks back and forth I feel like this will work.
Please Log in or Create an account to join the conversation.
2 years 3 months ago #238341
by neil
Cheers,
Neil
Pittsford, NY
Replied by neil on topic D2-5U13753 - master pins - please check my understanding
Made a bit of progress on the track frames. Welded new idler rails on to the front as the old ones were worn and twisted, and filled in all the flogged out bolt holes in prep for redrilling them. I'm not a welder so the first rail ended up crooked. I spent a lot more time grinding the second rail for as close a fit all around as I could manage (read: see), tacked it all over from side to side before welding, and it stayed dead straight so lesson learned. I cut about 50% of the first on on the side that I wanted it to move to, and rewelded the gap and it pulled it to within 1/8 at the end so I'm calling that good enough on the theory that I won't use these frames for long (which knowing me probably means they'll be on there forever....)
The existing channel has a wider flange on the bottom which Cat acknowledges in one of its promotional flyers for the D2 but I just used C5x9 which is all that I could get hold of. Hopefully it will be up to the task.
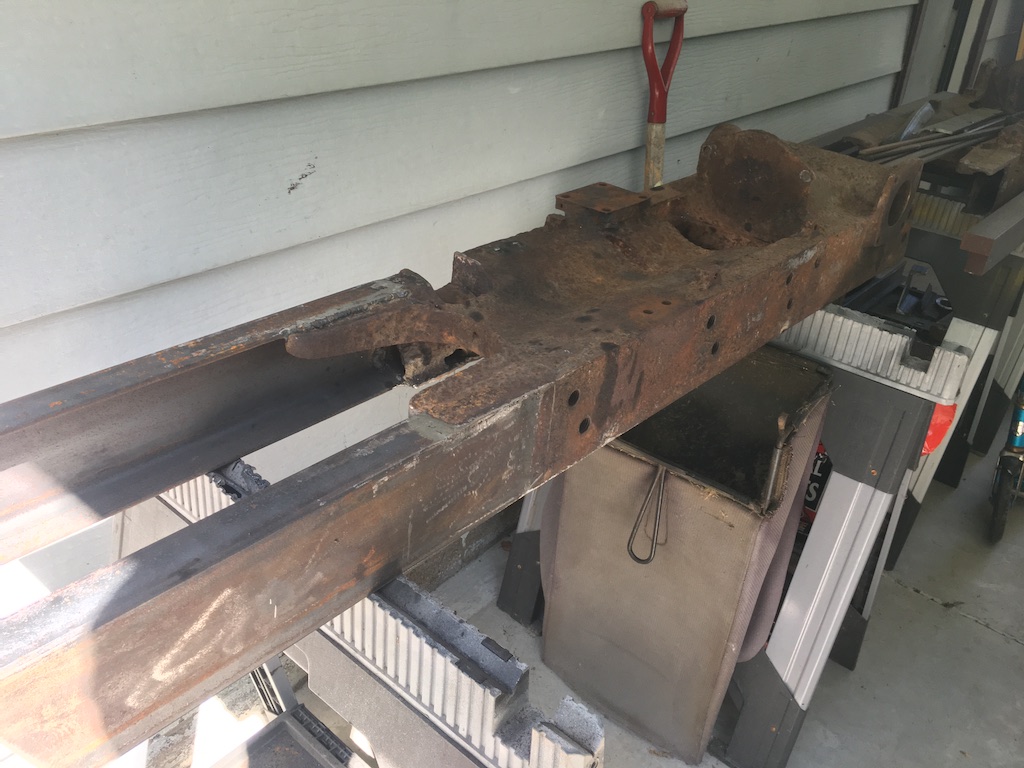
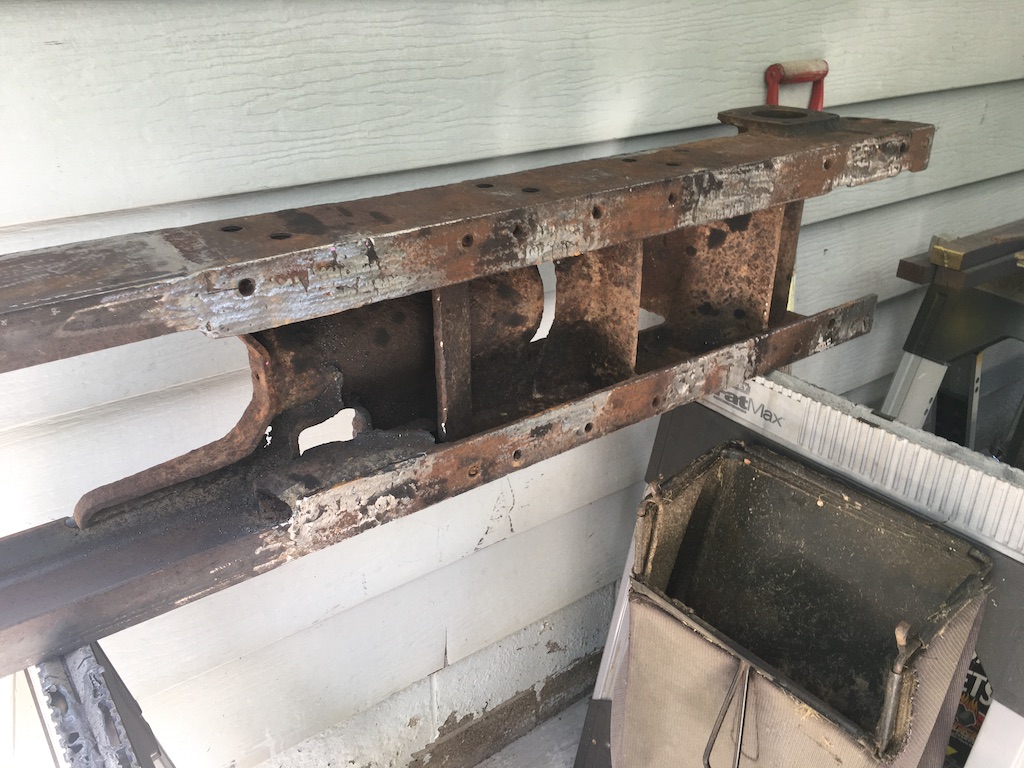
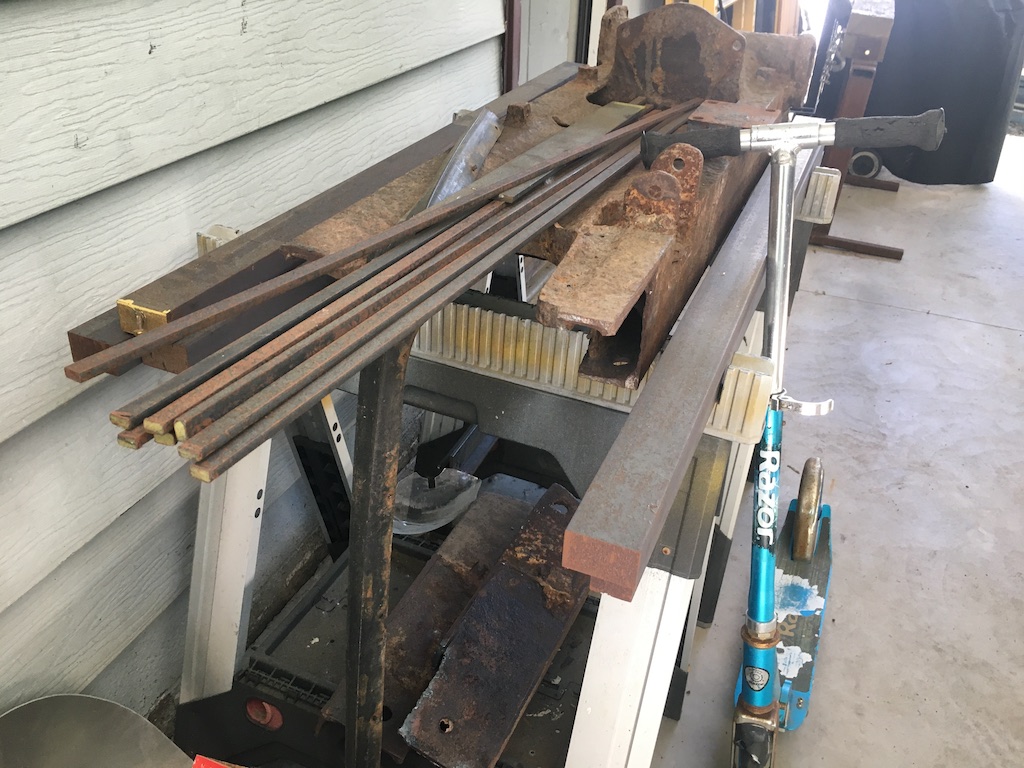
The existing channel has a wider flange on the bottom which Cat acknowledges in one of its promotional flyers for the D2 but I just used C5x9 which is all that I could get hold of. Hopefully it will be up to the task.
Cheers,
Neil
Pittsford, NY
Attachments:
Please Log in or Create an account to join the conversation.
2 years 3 months ago #238346
by dpendzic
D2, D3, D4, D6, 941B, Cat 15
Hancock Ma and Moriches NY
Replied by dpendzic on topic D2-5U13753 - master pins - please check my understanding
Neil--what type of steel did you use? also wouldn't hurt to spray galvanize them or at least coat with cold galvanizing compound
D2, D3, D4, D6, 941B, Cat 15
Hancock Ma and Moriches NY
Please Log in or Create an account to join the conversation.
2 years 3 months ago #238351
by neil
Cheers,
Neil
Pittsford, NY
Replied by neil on topic D2-5U13753 - master pins - please check my understanding
Hi Dan, it's A36 C5 x 9
Cheers,
Neil
Pittsford, NY
Please Log in or Create an account to join the conversation.
2 years 3 months ago #238357
by dpendzic
D2, D3, D4, D6, 941B, Cat 15
Hancock Ma and Moriches NY
Replied by dpendzic on topic D2-5U13753 - master pins - please check my understanding
OK--I always tried to source A588 steel as its more corrosion resistant and a bit higher strength--but may be more difficult to find
D2, D3, D4, D6, 941B, Cat 15
Hancock Ma and Moriches NY
Please Log in or Create an account to join the conversation.
2 years 3 months ago #238361
by neil
Cheers,
Neil
Pittsford, NY
Replied by neil on topic D2-5U13753 - master pins - please check my understanding
I picked mine up from Klein Steel's off-cuts depot so I took what they had. I'm hoping I don't have to rely on these old track frames for too long. Chad has a tractor that has the frames on it I want - he's deciding whether to get it running or part it out so I'm cooling my heels : )
Cheers,
Neil
Pittsford, NY
Please Log in or Create an account to join the conversation.
- trainzkid88
-

- Offline
- Platinum Boarder
- Member
Less
More
- Posts: 1017
- Thank you received: 387
2 years 3 months ago #238375
by trainzkid88
Replied by trainzkid88 on topic D2-5U13753 - master pins - please check my understanding
i would abrasive blast clean the steel and coat it with a zinc rich primer such as galvit E90 and then a good quality top coat. yes higher grades of steel are stronger but have workability problems for the non tradesman. and have limitations in the home workshop. not everyone has access to induction heating gear or even decent flame heating that many higher strength steels require pre and post welding.
for a machine that is in semi-active retirement provided those welds don't break it will work just fine for decades.
for a machine that is in semi-active retirement provided those welds don't break it will work just fine for decades.
Please Log in or Create an account to join the conversation.
- Forum
- Antique Caterpillar Machinery Owners Club
- DISCUSSION
- D2-5U13753 - master pins - please check my understanding
Time to create page: 0.461 seconds
ACMOC
Antique Caterpillar Machinery Owners Club
P.O. Box 9301
Peoria, IL 61612
(309) 691-5002
cat@acmoc.org
Become a Member!
"I became a member recently because the wealth of knowledge here is priceless."
- Chris R
"I also joined a year ago. had been on here a couple of times as a non-member and found the info very helpful so I got a one year subscription (not very expensive at all) to try it out. I really like all the resources on here so I just got a three year. I think its a very small price for what you can get out of this site."
- Jason N