- Posts: 6132
- Thank you received: 409

ACMOC Membership Benefits
- FREE quarterly magazine filled with content about antique Caterpillar machines
- FREE classified listings
- ACMOC store discounts and specials
- Full Bulletin Board Access
- Marketplace (For Sale/Wanted)
- Technical Library
- Post attachments
$44 /year ELECTRONIC
$60 /year USA
$77 /year International
- Forum
- Antique Caterpillar Machinery Owners Club
- DISCUSSION
- D2-5U13753 - master pins - please check my understanding
D2-5U13753 - master pins - please check my understanding
7 years 3 days ago #171251
by neil
Cheers,
Neil
Pittsford, NY
Replied by neil on topic D2-5U13753 - master pins - please check my understanding
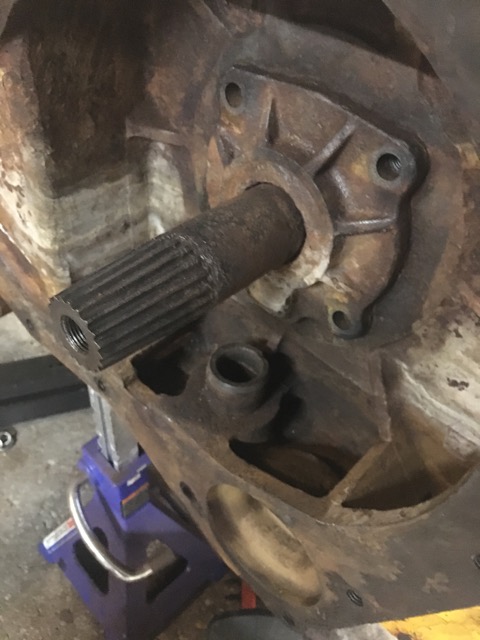
Got the torch out today and ran a cut up the boss of the inner left steering clutch hub then while it was hot, put the puller on it and cranked it as hard as I could with a 24" crescent wrench - didn't move. I guess I'll need to slice right through the boss before this thing lets go. I'll cut the steering yoke off too as the attaching bolts are pretty much solid with that and the bearing cage. This clutch is really fighting against the tools I have available...
Cheers,
Neil
Pittsford, NY
Please Log in or Create an account to join the conversation.
6 years 11 months ago #171893
by neil
Cheers,
Neil
Pittsford, NY
Replied by neil on topic Replacing left side bevel gear shaft bearing
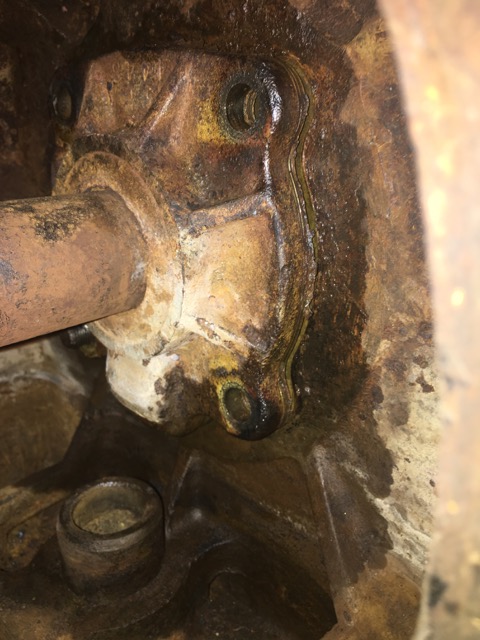
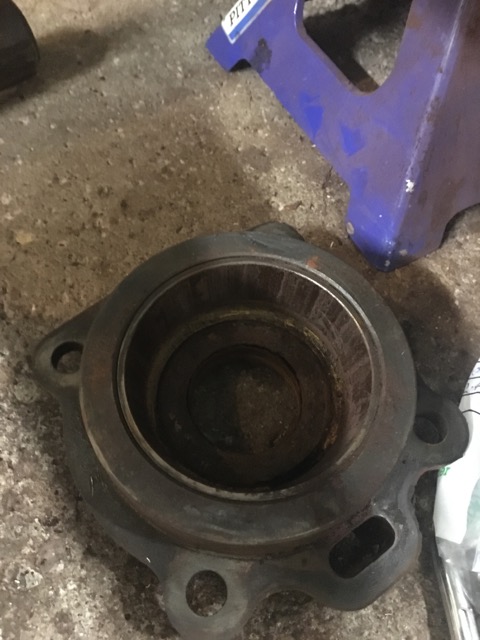
It's looking pretty rusty although I need to clean it up and see if the rust is in the actual bearing or is detritus accumulated from the failed seal. If I do have to change that bearing out (it's the one on the left side adjacent to the gear retaining nut), I was thinking of slicing the internal race to release it from the shaft, and then heat the new race/roller assembly in my over to install it.
I don't foresee any issues with this but wanted to check with the illuminati on whether there might be?
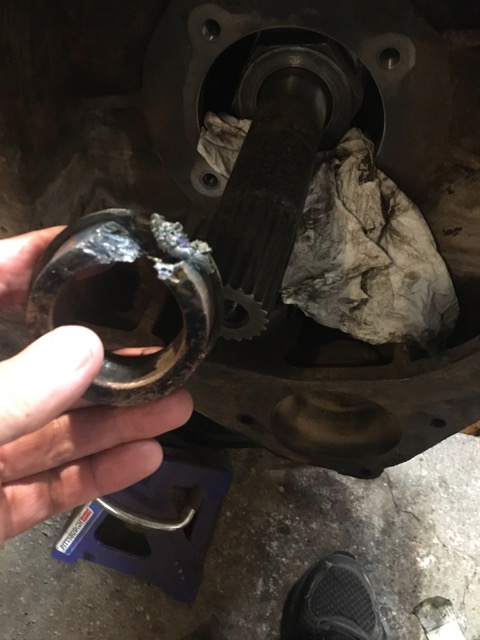
The steering chamber on that side was full of water so the shaft is pitted. I have a speedi-sleeve coming to deal with the seal, and a new set of just about all the components in that side's steering. About the only part I've managed to save from that side is the plate with the six pins in it and the bearing cup. Everything else was either toast or I had to cut it to remove it.
I don't foresee any issues with this but wanted to check with the illuminati on whether there might be?
The steering chamber on that side was full of water so the shaft is pitted. I have a speedi-sleeve coming to deal with the seal, and a new set of just about all the components in that side's steering. About the only part I've managed to save from that side is the plate with the six pins in it and the bearing cup. Everything else was either toast or I had to cut it to remove it.
Cheers,
Neil
Pittsford, NY
Please Log in or Create an account to join the conversation.
6 years 11 months ago #172200
by neil
Cheers,
Neil
Pittsford, NY
Replied by neil on topic D2-5U13753 - master pins - please check my understanding
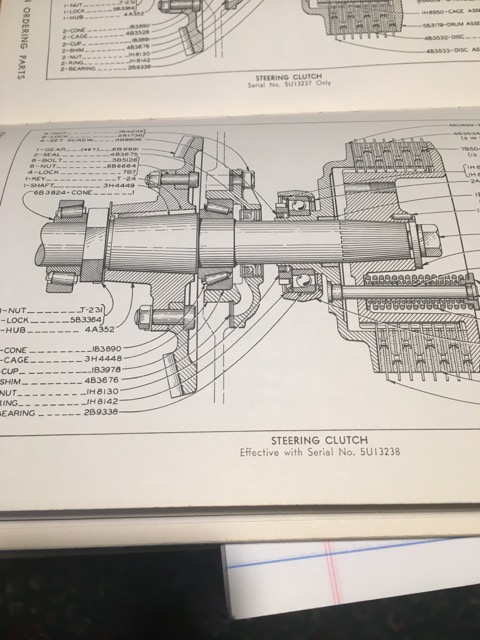
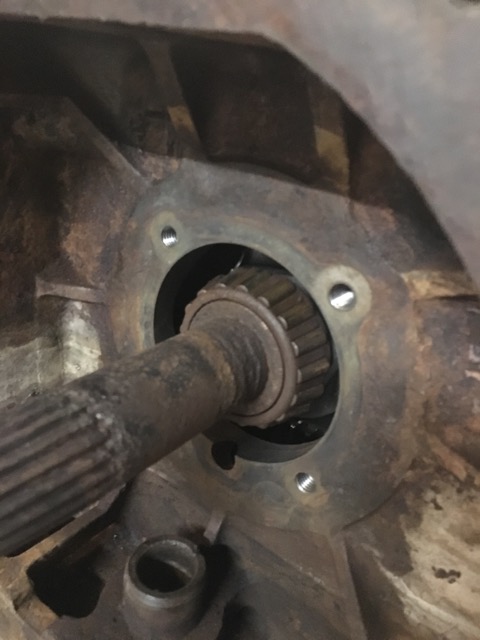
I need to get this bearing cage off. It doesn't have forcing screw holes and the shims are the same shape / size as the cage. What would folks suggest as a technique for removal? I can see the bearing race in the bevel gear chamber but I think that gets removed after the bevel gear shaft and gear assembly are removed.
Cheers,
Neil
Pittsford, NY
Please Log in or Create an account to join the conversation.
6 years 11 months ago #172204
by STEPHEN
Replied by STEPHEN on topic D2-5U13753 - master pins - please check my understanding
Neil, don't remember exactly, but I think my pinion was removed, allowing bumping on the left shaft to remove the right cup holder, and then swap sides
Please Log in or Create an account to join the conversation.
6 years 11 months ago #172229
by neil
Cheers,
Neil
Pittsford, NY
Replied by neil on topic D2-5U13753 - master pins - please check my understanding
Thanks Stephen. I fooled with it a little last night, seeing if there was any lateral movement in the bearings, which there isn't. I guess I'll just try tapping it here and there to see what I can get. I "could" drill and tap the cage to add forcing screws. I'll look at doing that for sure if I manage to remove it. My other option is to see if I can get the oil seal out, and then grab on to the lip inside. Parts catalog shows the cage opening out behind the seal and before the bearing. It also shows that the outer race is contained within the cage, so presumably I can tap on that to see if I can effect movement.
Cheers,
Neil
Pittsford, NY
Please Log in or Create an account to join the conversation.
6 years 11 months ago #172328
by neil
Cheers,
Neil
Pittsford, NY
Replied by neil on topic D2-5U13753 - master pins - please check my understanding
I cleaned up the cage retaining stud holes, and using some washers and some square stock, forced it back from the inside. Not completely out yet but has moved so I know I'm good. I have a new bearing and a speedi-sleeve for the seal, and my new steering components arrived from John Park so making progress. There are a few broken studs to clean up on the final case but it's just about ready to go back together.
Cheers,
Neil
Pittsford, NY
Please Log in or Create an account to join the conversation.
6 years 11 months ago #172579
by neil
Cheers,
Neil
Pittsford, NY
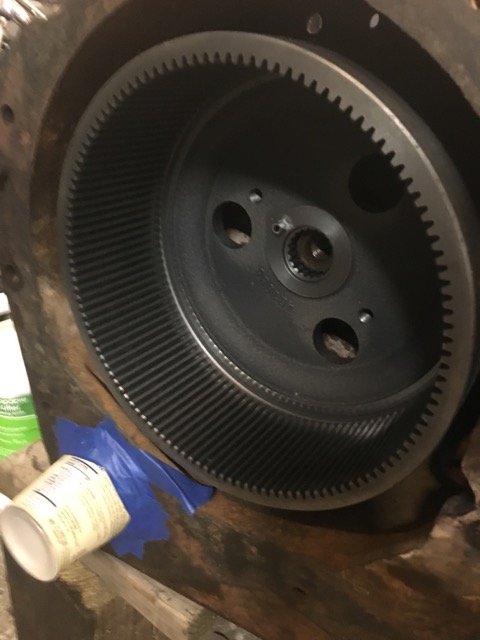
Replied by neil on topic D2-5U13753 - master pins - please check my understanding
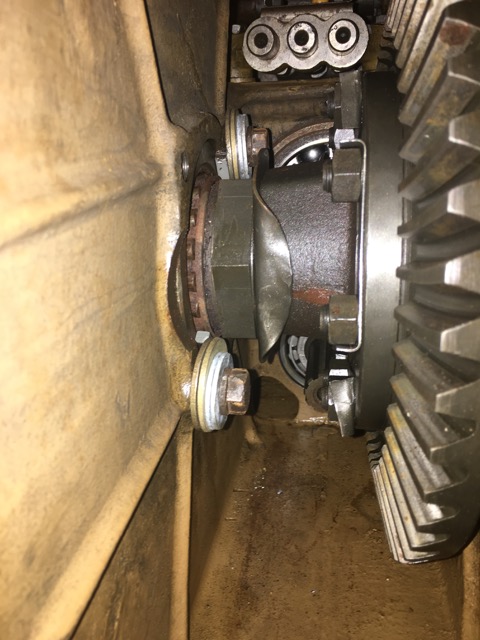
More progress. Removed the bearing cup cage, cup, and seal (about 3/4" wide - they don't make 'em like that anymore?), then used the gas axe to slice the bearing cage race off the bevel gear shaft. Gave everything a once-over with sandpaper, vacuumed all the slag out, and figured out my (only get one shot to get it right) sequence to make sure everything goes back together ok. Also received a box of new steering parts from John Park, and some new and pre-loved parts from Dana, which along with new hardware, gaskets, bearings, seals, etc. from Milton Cat and a speedi-sleeve from eBay, I think I have everything to put the left side back together. Most parts are new so this thing should turn left like a dream : ).
And, I couldn't part without a shot of my favorite bird. He's looking mighty plump this time of year....
And, I couldn't part without a shot of my favorite bird. He's looking mighty plump this time of year....
Cheers,
Neil
Pittsford, NY
Please Log in or Create an account to join the conversation.
- Garlic Pete
-

- Offline
- Platinum Boarder
- Member
Less
More
- Posts: 2534
- Thank you received: 0
6 years 11 months ago #172599
by Garlic Pete
Replied by Garlic Pete on topic New Drum.
Man, that new drum just looks so nice sitting there. When I get to that point in a project, I usually have a hard time continuing to add parts and put covers on. I need to spend a day or two just walking by, admiring those shiny new parts that are going to last for sixty or more years and I'll never get to look at again.
Good work, you'll be ready to pull that new 36A in the shop soon.
Pete.
Good work, you'll be ready to pull that new 36A in the shop soon.
Pete.
Please Log in or Create an account to join the conversation.
6 years 11 months ago #172629
by drujinin
Replied by drujinin on topic D2-5U13753 - master pins - please check my understanding
Need to put the corn to him to add a layer of fat! 
Then he'll be ready for an invitation to Thanksgiving Dinner!
Then he'll be ready for an invitation to Thanksgiving Dinner!
Please Log in or Create an account to join the conversation.
6 years 11 months ago #172637
by neil
Cheers,
Neil
Pittsford, NY
Replied by neil on topic D2-5U13753 - master pins - please check my understanding
GP, I'm assuming that the other brake drum will also need to be replaced, if it has those same worn out rings where the teeth on the discs engage. If I can get the inner drum off, and if it doesn't have any wear rings, then it can stay. But this left side is just about completely new. I even had to cut the yoke out as there was no way it was coming apart so I picked up a good used one from Dana.
Should turn (left) like a new one once it's back together I marked out the location that the speedi-sleeve needs to be positioned, but I need a piece of 2" schedule 40 to drive the new bevel gear bearing cone on so yet another trip to the hardware store
Jeff, those good boys get all our kitchen scraps but I think he spends too much time walking and not enough putting on weight. He can still fly up to roost in the neighbor's tree, about 40' up, so that's a bit too athletic for me. I think it's going to be a Butterball again this year...
Should turn (left) like a new one once it's back together
I marked out the location that the speedi-sleeve needs to be positioned, but I need a piece of 2" schedule 40 to drive the new bevel gear bearing cone on so yet another trip to the hardware storeJeff, those good boys get all our kitchen scraps but I think he spends too much time walking and not enough putting on weight. He can still fly up to roost in the neighbor's tree, about 40' up, so that's a bit too athletic for me. I think it's going to be a Butterball again this year...
Cheers,
Neil
Pittsford, NY
Please Log in or Create an account to join the conversation.
- Forum
- Antique Caterpillar Machinery Owners Club
- DISCUSSION
- D2-5U13753 - master pins - please check my understanding
Time to create page: 0.416 seconds
ACMOC
Antique Caterpillar Machinery Owners Club
P.O. Box 9301
Peoria, IL 61612
(309) 691-5002
cat@acmoc.org
Become a Member!
"I became a member recently because the wealth of knowledge here is priceless."
- Chris R
"I also joined a year ago. had been on here a couple of times as a non-member and found the info very helpful so I got a one year subscription (not very expensive at all) to try it out. I really like all the resources on here so I just got a three year. I think its a very small price for what you can get out of this site."
- Jason N