- Posts: 6
- Thank you received: 1

ACMOC Membership Benefits
- FREE quarterly magazine filled with content about antique Caterpillar machines
- FREE classified listings
- ACMOC store discounts and specials
- Full Bulletin Board Access
- Marketplace (For Sale/Wanted)
- Technical Library
- Post attachments
$44 /year ELECTRONIC
$60 /year USA
$77 /year International
Caterpillar RD-6 steering clutches
- rustyrestorations
-
 Topic Author
- Offline
- New Boarder
- Member
I finally got around to removing the clutch assembly out of my 2H RD6... had to wait untill the tundra warmed up to more than -30°F lol. not sure if I'm beating a dead horse, but I've found minimal resources on this process aside from a couple helpful members here, and outside of "computer land". So I figured I'd post an update, for anyone who may need a reference in the future.
I've considered making more videos on YouTube, but that depends on expressed interest by other people, since it's a lot of work! So let me know.
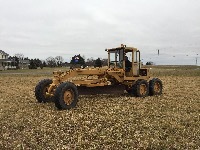
First step was to get all 20 brake drum bolts removed. This is done by moving the machine back and forth. Due to the gears in the final drives, you only need to move the machine about 3 feet. I believe the manual calls for the usage of the pony motor and 1st gear. Which is probably the most controllable method. But I had help, so I used my 112e (grader) and jogged it that way. My bolts (3/4" head about 1 1/4" long) were easily broken loose with a regular ratchet + 4" extension. Accessed through a pipe plug on the side of the housing just forward of the final drives. I would imagine you need to be very careful not to break them, or you'll have a very very bad day. Once I had the bolts out I jogged the machine again to break any light rust bonds between the surfaces. Then I collapsed the drums (inwards to gain necessary clearance to remove the whole assembly with a short prybar.
Once that was done, I marked the positions of the adjustment nuts with a center punch. For reference later. And backed them off. (There is an adjustment procedure for this, but this will help to get it back in the ball park, worst case.) This is very important to prevent from chipping the teeth on the bull or pinion gears upon removal. Then remove the bearing caps and bolts. I strapped the steering clutch yokes and used an engine hoist to pick the whole assembly out. i recommend this method Because It's very controllable. Like I said before, it's important to avoid damaging the gears.
That's as far as I got as of now. Once in the shop I stripped most of the recycled dinosaurs off the parts to get a good look at what I had going. The gears looked good, as did the main bearings and clutches. now I'm about to start making the tools to start disassembly of it. Discovered I Need a bigger puller for the taper, and a special tool for the clutch springs.. I'll be sure to keep this thread updated, and if enough Intrest is shown, I'll consider making some videos... hopefully a little easier to digest than 500 lines of Midwest highschool English..
Please Log in or Create an account to join the conversation.
- Mike Meyer
-

- Offline
- Platinum Boarder
- Member
- Posts: 3258
- Thank you received: 187
Don't be afraid to take photo's and share them.
Good luck
Mike
Please Log in or Create an account to join the conversation.
Please Log in or Create an account to join the conversation.
Please Log in or Create an account to join the conversation.
Best friend I had was a manual. Even though it was a reprint, it gave me direction on what to do. I had ZERO experience working on CATs when I did mine.
Don't be bashful about asking questions or better yet, post some pictures please. There could be some tricks and pointers that the seasoned "pros" (not me btw) could share with you to make your task easier.
Please Log in or Create an account to join the conversation.
- rustyrestorations
-
 Topic Author
- Offline
- New Boarder
- Member
- Posts: 6
- Thank you received: 1
luckily I have a repop parts book. But It appears the service manuals are over by the arc of the covenant... been watching eBay and Facebook sales groups closely for sure.Your'e doing great by digging in with both hands. My first D4 project seemed like a lost cause, but I was determined. Quite pleased with myself, so If I could do it, you can as well.
Best friend I had was a manual. Even though it was a reprint, it gave me direction on what to do. I had ZERO experience working on CATs when I did mine.
Don't be bashful about asking questions or better yet, post some pictures please. There could be some tricks and pointers that the seasoned "pros" (not me btw) could share with you to make your task easier.
Please Log in or Create an account to join the conversation.
Keep us all posted on your project. It sounds like a fun one. JM
Please Log in or Create an account to join the conversation.
there were no D6 Service Manuals until the R series, however the D8 1H, 8R, 2u and 13A Serv. Man. Form No 31271 or the later -01, -02, etc. editions will suffice for explanations of remove and refit procedures and has the same secondary steer clutch lever serrated lever pivot block adjustments on the floor of the steer clutch compartments. My RD6 steering was rejuvenated after discovering about these secondary pivot adjustments and she went on to do a lot of work afterwards without further adjustment.
At the Dealer we most often used a 10 ton jack to move the machine forwards or backwards to position the steer brake drum bolts to the opening as it was more controlled and close to said opening especially when working alone--my guess for the pony engine use was to only crank the pony over to move the machine without the pony running--I could see this being dangerous in confined areas if the pony started up unexpectedly. In the Dealer and often clients shops machines were often lined up one behind the other in the work bays. and so were close to each other.
Cheers,
Eddie B.
Please Log in or Create an account to join the conversation.
ACMOC
Antique Caterpillar Machinery Owners Club
P.O. Box 9301
Peoria, IL 61612
(309) 691-5002
cat@acmoc.org
"I became a member recently because the wealth of knowledge here is priceless."
- Chris R
"I also joined a year ago. had been on here a couple of times as a non-member and found the info very helpful so I got a one year subscription (not very expensive at all) to try it out. I really like all the resources on here so I just got a three year. I think its a very small price for what you can get out of this site."
- Jason N


