- Posts: 26
- Thank you received: 1

ACMOC Membership Benefits
- FREE quarterly magazine filled with content about antique Caterpillar machines
- FREE classified listings
- ACMOC store discounts and specials
- Full Bulletin Board Access
- Marketplace (For Sale/Wanted)
- Technical Library
- Post attachments
$44 /year ELECTRONIC
$60 /year USA
$77 /year International
- Forum
- Antique Caterpillar Machinery Owners Club
- DISCUSSION
- Creamy Oil in Steering Clutch control box
Creamy Oil in Steering Clutch control box
- Tony Clarke
-
 Topic Author
- Offline
- Junior Boarder
- User
Less
More
3 years 5 months ago #226908
by Tony Clarke
Replied by Tony Clarke on topic Creamy Oil in Steering Clutch control box
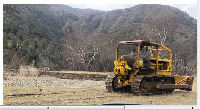
We picked up the blade at Florin in Sacramento and moved it up to the ridge where the dozer is parked. The old blade is disconnected and trying to get the cable winch adjusted to pick up the replacement blade. Adjusted the cable winch by loosing the clamp around the adjustment nut and removing the four 1/2 inch bolts. I adjusted counter clockwise and re tightened and started the main engine. Winch still didn't work. Went through this three more times....still no progress. Does anyone know where to go from here? I heard the plates scraping and then went one more to the left with the adjustment still no action. What now?
Please Log in or Create an account to join the conversation.
3 years 5 months ago #226910
by juiceman
Replied by juiceman on topic Creamy Oil in Steering Clutch control box
Does your clutch need to be engaged to operate the winch?
Please Log in or Create an account to join the conversation.
- Tony Clarke
-
Topic Author
- Offline
- Junior Boarder
- User
Less
More
- Posts: 26
- Thank you received: 1
3 years 5 months ago #226911
by Tony Clarke
Replied by Tony Clarke on topic Creamy Oil in Steering Clutch control box
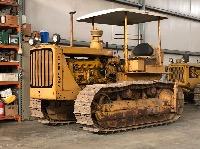
no. The shaft from the transmission turns the gears in the winch continually. The clutch plates are actualized by a linkage from the operators seat. The winch is a CU 29 double drum winch
on a D8 36A H series serial 2618
on a D8 36A H series serial 2618
Please Log in or Create an account to join the conversation.
- Deas Plant.
-

- Offline
- Platinum Boarder
- Member
Less
More
- Posts: 5551
- Thank you received: 279
3 years 5 months ago #226914
by Deas Plant.
You have a wonderful day. Best wishes. Deas Plant.
Replied by Deas Plant. on topic Creamy Oil in Steering Clutch control box
Hi, Anthony.
If I remember correctly, the end of the CCU control should have about 5 - 5 1/2" inches of movement from neutral to clutch engaged. At that point, the lever should come up against hard resistance.
Did the CCU hold the blade up in the past. If it did, your brake spring tension is probably O.K.. 'A$$-uming that it is, the next step is to use the 2 adjusting nuts on the 'business' end of the brake actuation lever to set the neutral position for the actuation lever. This is done by adjusting those nuts so that the small hole in the arm that the roller runs on is lined up with the center of the roller.
THEN, and only then, are you in a position to adjust the clutch. It's bin a while since I looked atta #29 cable control but I am scratching head and wondering about the "four 1/2 bolts" that you mentioned. Can you post a photo of those bolts, please?
Just my 0.02.
You have a wonderful day. Best wishes. Deas Plant.
The following user(s) said Thank You: Tony Clarke
Please Log in or Create an account to join the conversation.
- Tony Clarke
-
Topic Author
- Offline
- Junior Boarder
- User
Less
More
- Posts: 26
- Thank you received: 1
3 years 5 months ago #226918
by Tony Clarke
Replied by Tony Clarke on topic Creamy Oil in Steering Clutch control box
On the outside of the housing there is a square nut about 1 1/2 inches with a zerk fitting. It is held in place on a circular welded plate that has the four
1/2 in bolts holding to the drum. when you remove the bolts and loosen the 3/4 inch bolt that secures the plate in place you can adjust the clutch
according to a cat manual.. I have pictures of it but don’t know how to post them. please email me Dease and I can send them to you.
Thanks, Tony
1/2 in bolts holding to the drum. when you remove the bolts and loosen the 3/4 inch bolt that secures the plate in place you can adjust the clutch
according to a cat manual.. I have pictures of it but don’t know how to post them. please email me Dease and I can send them to you.
Thanks, Tony
Please Log in or Create an account to join the conversation.
- Tony Clarke
-
Topic Author
- Offline
- Junior Boarder
- User
Less
More
- Posts: 26
- Thank you received: 1
3 years 5 months ago #226919
by Tony Clarke
Replied by Tony Clarke on topic Creamy Oil in Steering Clutch control box
my email address is This email address is being protected from spambots. You need JavaScript enabled to view it.
Please Log in or Create an account to join the conversation.
- Deas Plant.
-
- Offline
- Platinum Boarder
- Member
Less
More
- Posts: 5551
- Thank you received: 279
3 years 5 months ago #226934
by Deas Plant.
You have a wonderful day. Best wishes. Deas Plant.
Replied by Deas Plant. on topic Creamy Oil in Steering Clutch control box
Hi, Anthony.
Yep, the very same. That plate with the square nut is only an end cap. Take those 4 bolts out and you are adjusting nothing except the position of the end cap.
Work out which way the clutch actuating lever inside the CCU cover moves when you pull the control lever toward you to engage the clutch. It will always move AWAY from the brake actuating lever.
Then loosen the clamp bolt and turn the top of the square nut toward the actuating lever, i.e. if the actuating lever moves forward, you turn the top of the square nut back until you have about 5" to 5 1/2" of free travel at the end of the control lever.
Just my 0.02. Hope it helps.
You have a wonderful day. Best wishes. Deas Plant.
The following user(s) said Thank You: Tony Clarke
Please Log in or Create an account to join the conversation.
- Tony Clarke
-
Topic Author
- Offline
- Junior Boarder
- User
Less
More
- Posts: 26
- Thank you received: 1
3 years 1 month ago #230307
by Tony Clarke
Replied by Tony Clarke on topic Creamy Oil in Steering Clutch control box
We changed the blade and moved the dozer back to tobacco flats with the old blade chained to the new one. Everything is working well but we are chainging out the u joints on the cable winch drive. We had to modify the blade struts to fit the new blade. Will be getting back to it once it cools down.
The following user(s) said Thank You: edb
Please Log in or Create an account to join the conversation.
- Deas Plant.
-
- Offline
- Platinum Boarder
- Member
Less
More
- Posts: 5551
- Thank you received: 279
3 years 1 month ago #230314
by Deas Plant.
You have a wonderful day. Best wishes. Deas Plant.
Replied by Deas Plant. on topic Creamy Oil in Steering Clutch control box
Hi, Tony.
Sounds like progress has been made.
Good stuff.
Just my 0.02.
Sounds like progress has been made.
Good stuff.
Just my 0.02.
You have a wonderful day. Best wishes. Deas Plant.
Please Log in or Create an account to join the conversation.
- Forum
- Antique Caterpillar Machinery Owners Club
- DISCUSSION
- Creamy Oil in Steering Clutch control box
Time to create page: 0.162 seconds
ACMOC
Antique Caterpillar Machinery Owners Club
P.O. Box 9301
Peoria, IL 61612
(309) 691-5002
cat@acmoc.org
Become a Member!
"I became a member recently because the wealth of knowledge here is priceless."
- Chris R
"I also joined a year ago. had been on here a couple of times as a non-member and found the info very helpful so I got a one year subscription (not very expensive at all) to try it out. I really like all the resources on here so I just got a three year. I think its a very small price for what you can get out of this site."
- Jason N